


THE BIG PROBLEM
SuperSprings and SumoSprings together are the best suspension upgrade for your van.
Since the beginning of the cargo van conversion era, VanLifers have been running into the same problem. The stock suspension on most cargo vans is not designed to be carrying all the weight of heavy conversions. From plumbing to electrical and hiking gear to paddle boards and everything in between. All that weight puts immense stress on the suspension. As the builds get more and more elaborate the maximum weight capacity is hit even quicker. Leading up to the problem, how to upgrade the suspension to counter all that weight.
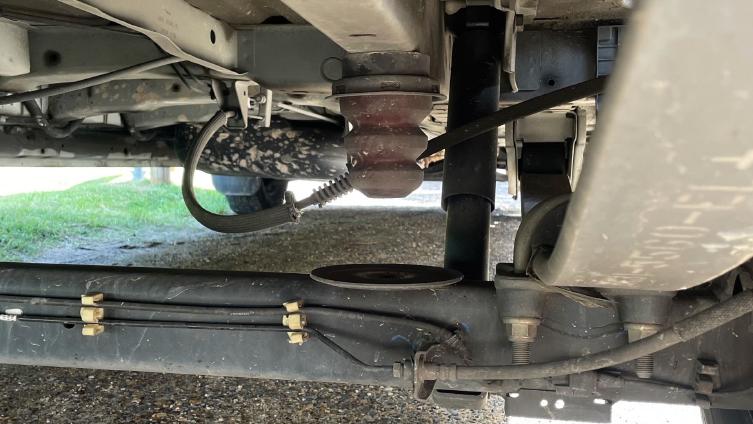
Marcel and Vendi have converted a Ford Transit Van and are now at the maximum legal gross vehicle weight. After driving around for a year they noticed the ride quality had started to degrade. The weight of the conversion was taking its toll on the suspension. Fitted with the stock parabolic spring and factory bump stops, the weight has compressed the rear suspension. This has essentially eliminated the gap that was once there, causing the ride to become less than enjoyable. With the weight even heavier on the driver side the factory bump stop had worn down nearly flat. So what is the best suspension solution for Ford Transit Vans?


THE FIRST UPGRADE – SUPERSPRINGS
When it comes to upgrading the suspension on a van the first thing you will want to do is remove the sag. This involves upgrading the parabolic spring. Which is different from a leaf spring in that you can not just add another leaf to the spring pack. To upgrade the actual parabolic spring itself would require getting one custom build and replacing the existing one. This can cost thousands of dollars, take a long time, and finding a manufacturer that would do it. Enter the SuperSprings, this steel helper spring is a bolt on solution that reduces rear-end sag. It is designed with a patented roller shackle on each end that allows for self-adjustment as weight is changed.
THE SECOND UPGRADE – SUMOSPRINGS
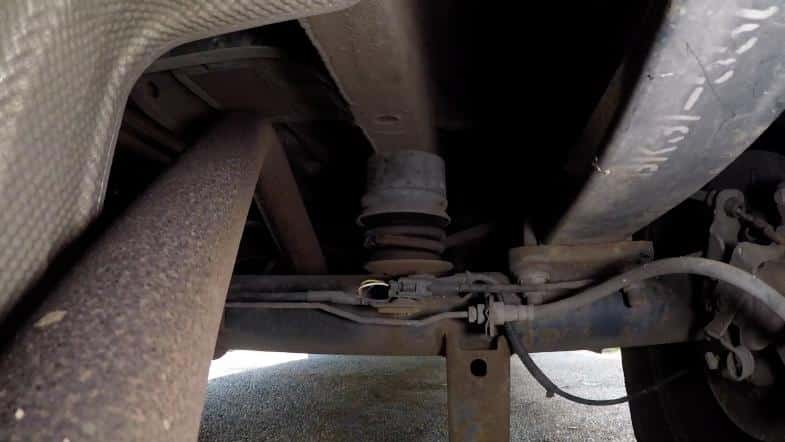
Once the sag is reduced with the SuperSprings and the van is back up closer to factory ride height. The ride quality can still be improved upon even more with SumoSprings in the front and rear. Compared to the factory bump stop this SumoSprings is nearly twice the size! Adding these SumoSprings in the rear will reduce the sway from all the weight that is added higher up in the build and to the roof. As well as Coil SumoSprings in the front coil springs to help stiffen the suspension and make turning corners smoother.

A BASELINE
In an effort to see how much of a difference these suspension upgrades would make, Marcel took their van out to show what the current suspension was like and he said,
“I can feel every single one of those bumps, even driving at highway speeds hitting a small pothole feels like someone just punched your spine!”
After driving on bumpy dirt roads, over large dips, and on curvy highways, Marcel also took measurements for comparison later.
THE INSTALLS – SumoSprings
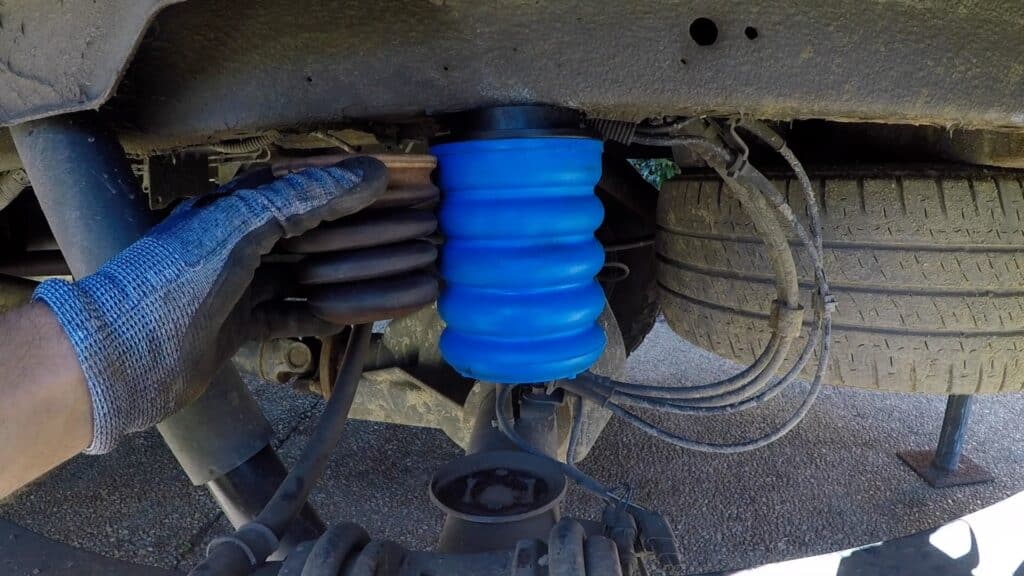
Really the only tools needed to do this installation are a socket set, a jack, C clamps, and some jack stands. Starting in the rear, we are going to jack up the back and use the jack stands, then take the wheel off. Then remove the existing factory bump stop and mounting components. With that out of the way add some blue thread locker (included in your kit) to your SumoSpring threads and screw it on. It’s that easy. Marcel used one spacer with his SumoSpring so that there would be about half an inch of space between the spring and the contact plate when at ride height.
THE INSTALLS – SuperSprings
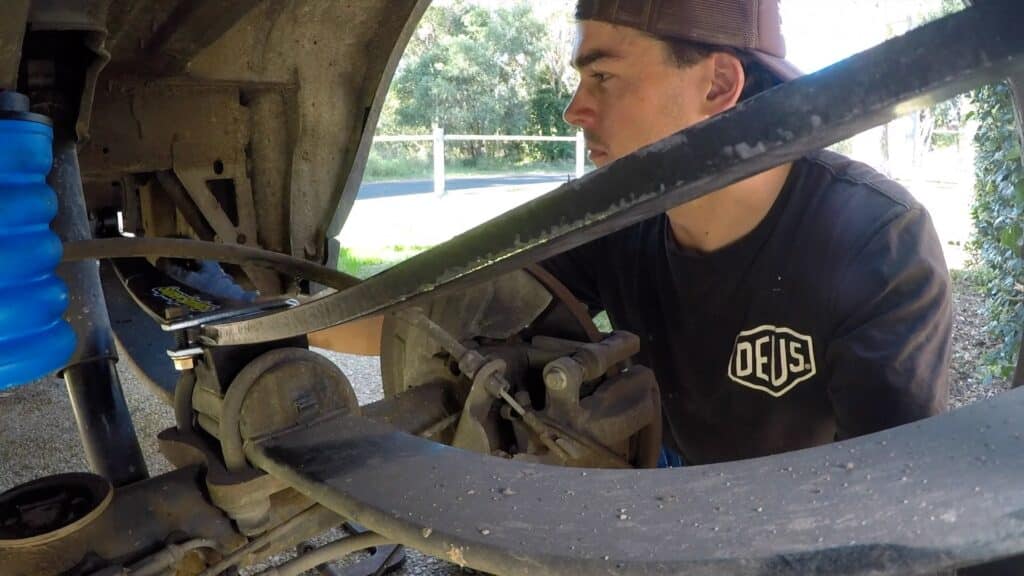
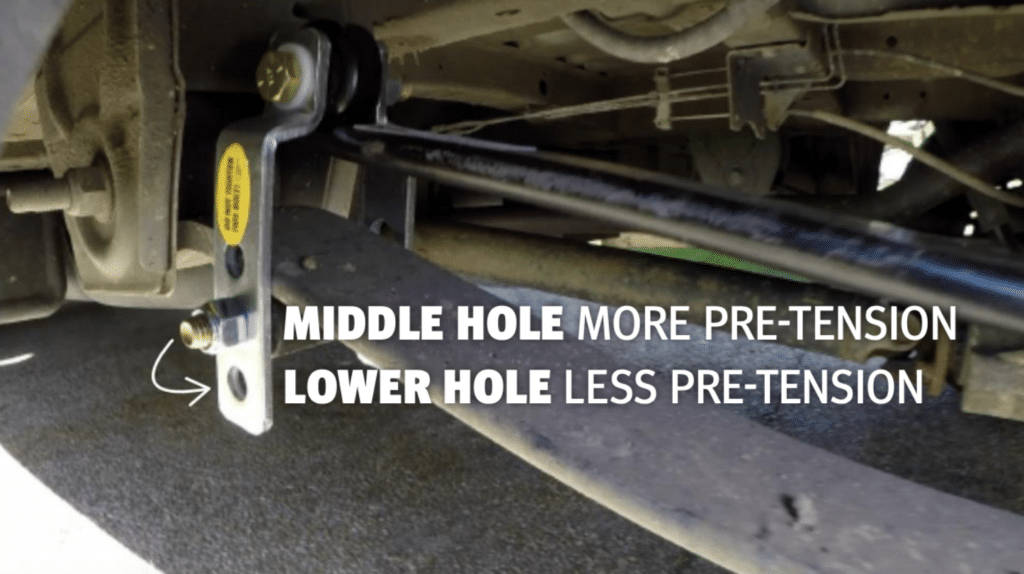
Now on to the SuperSprings. With the roller bolt assembly removed, position the SuperSpring on the existing spring and secure the roller bolt through the shackle hole that gives you the desired pre-load tension (lower hole equals less pre-load and upper hole equals more pre-load tension). Now clamp the other side of the SuperSpring with C clamps lowering the spring until the roller bolt assembly fits at the desired shackle hole. Once everything is in place carefully remove the C clamps, reinstall the wheel, and lower the vehicle to the ground.
THE INSTALLS – Coil SumoSprings
Lastly, the front. Adding Coil SumoSprings to the front end of the van will give the suspension even more help. In addition to keeping the wheel from hitting the wheel arch like Marcel and Vendi had experienced. With the front jacked up, wipe the coil spring with some soapy water. Iinsert the end of the Coil SumoSpring into the middle of the coil spring with the shallow groove up and the deeper groove down. Once it is started, keep working it into place until the Coil SumoSpring is wrapped all the way around the coil spring and positioned about half way up the coil spring. Lower the vehicle and the installation is complete.
SOME ADJUSTMENTS TO THE SUPERSPRINGS
After the first test drive with the suspension upgraded, Marcel was not completely happy with the ride quality still. He had put the roller bolt assembly of the SuperSpring on the middle hole thinking that they would want some more pre-load tension. This caused the ride to be stiffer than they would like. This is an easy fix though because SuperSprings are completely adjustable to your ride preference. Once he moved the roller bolts to the lower hole of the shackle the SumoSpring was able to kick it up a notch. It started engaging with the rest of the suspension more, creating a smoother ride that wasn’t quite as stiff.

THE TEST DRIVE
From the moment Marcel and Vendi left their driveway they could feel the difference the upgrade made to the suspension. From the paved roads to the dirt roads they felt that the ride was so much smoother, less bumps, less body roll, and better handling on the corners. Massive improvements in the ability to take a turn without having to slow down as much. Before it felt like the whole van was going to roll over. “I’ve noticed an exponential increase in the drive quality,” stated Marcel. Here are the measurements of the van before and after the upgrade so you can see the difference in the ride height.


FINAL THOUGHTS
Marcel was really stoked about the improvements in the ride quality of this van. As more people add more weight to their van conversions, doing these simple upgrades to the suspension will give back the ride quality and prevent the extra wear and tear that happens to these vehicles so that they can get back to having better journeys.
Watch this video of Marcel installing and reviewing the SuperSprings and SumoSprings,
Sign Up and #JourneyBetter
Embark on a better journey with SuperSprings International. Sign up for our newsletter to receive professional tips, product updates, and exclusive offers.
ABOUT MARCEL & VENDI OF SALTY VANVENTURES


We are Marcel and Vendula and we come from opposite sides of the world. Marcel is from Australia and Vendula from the Czech Republic. We met and fell in love in 2017 while both hiking the Ho Chi Minh Trail in a remote part of Vietnam. After a whirl wind 5 days together, we jumped right into the deep end and began our life in New Zealand. This is where we designed and built our first campervan in 2018.
From that moment we knew we didn’t want to live what some would call a “normal” life. Our passion for travel, freedom and creativity led us to the van life. It wasn’t easy, we had many set-backs and we faced a lot of doubts. But we can tell you now that our commitment to creating our life the way we wanted was the best thing we’ve ever done and will ever do. Since then we have traveled the world and are now living and working in our 3rd van conversion while travelling Australia. Follow along with their travels and van builds on YouTube and Instagram @salty_vanventures and saltyvanventures.com
Use our application guide to see what we have for your vehicle.