
Original Article by Jessie Nugent & Bill Doherty Jr. of Nomadder Where Van
PART ONE – SuperSprings in the Rear
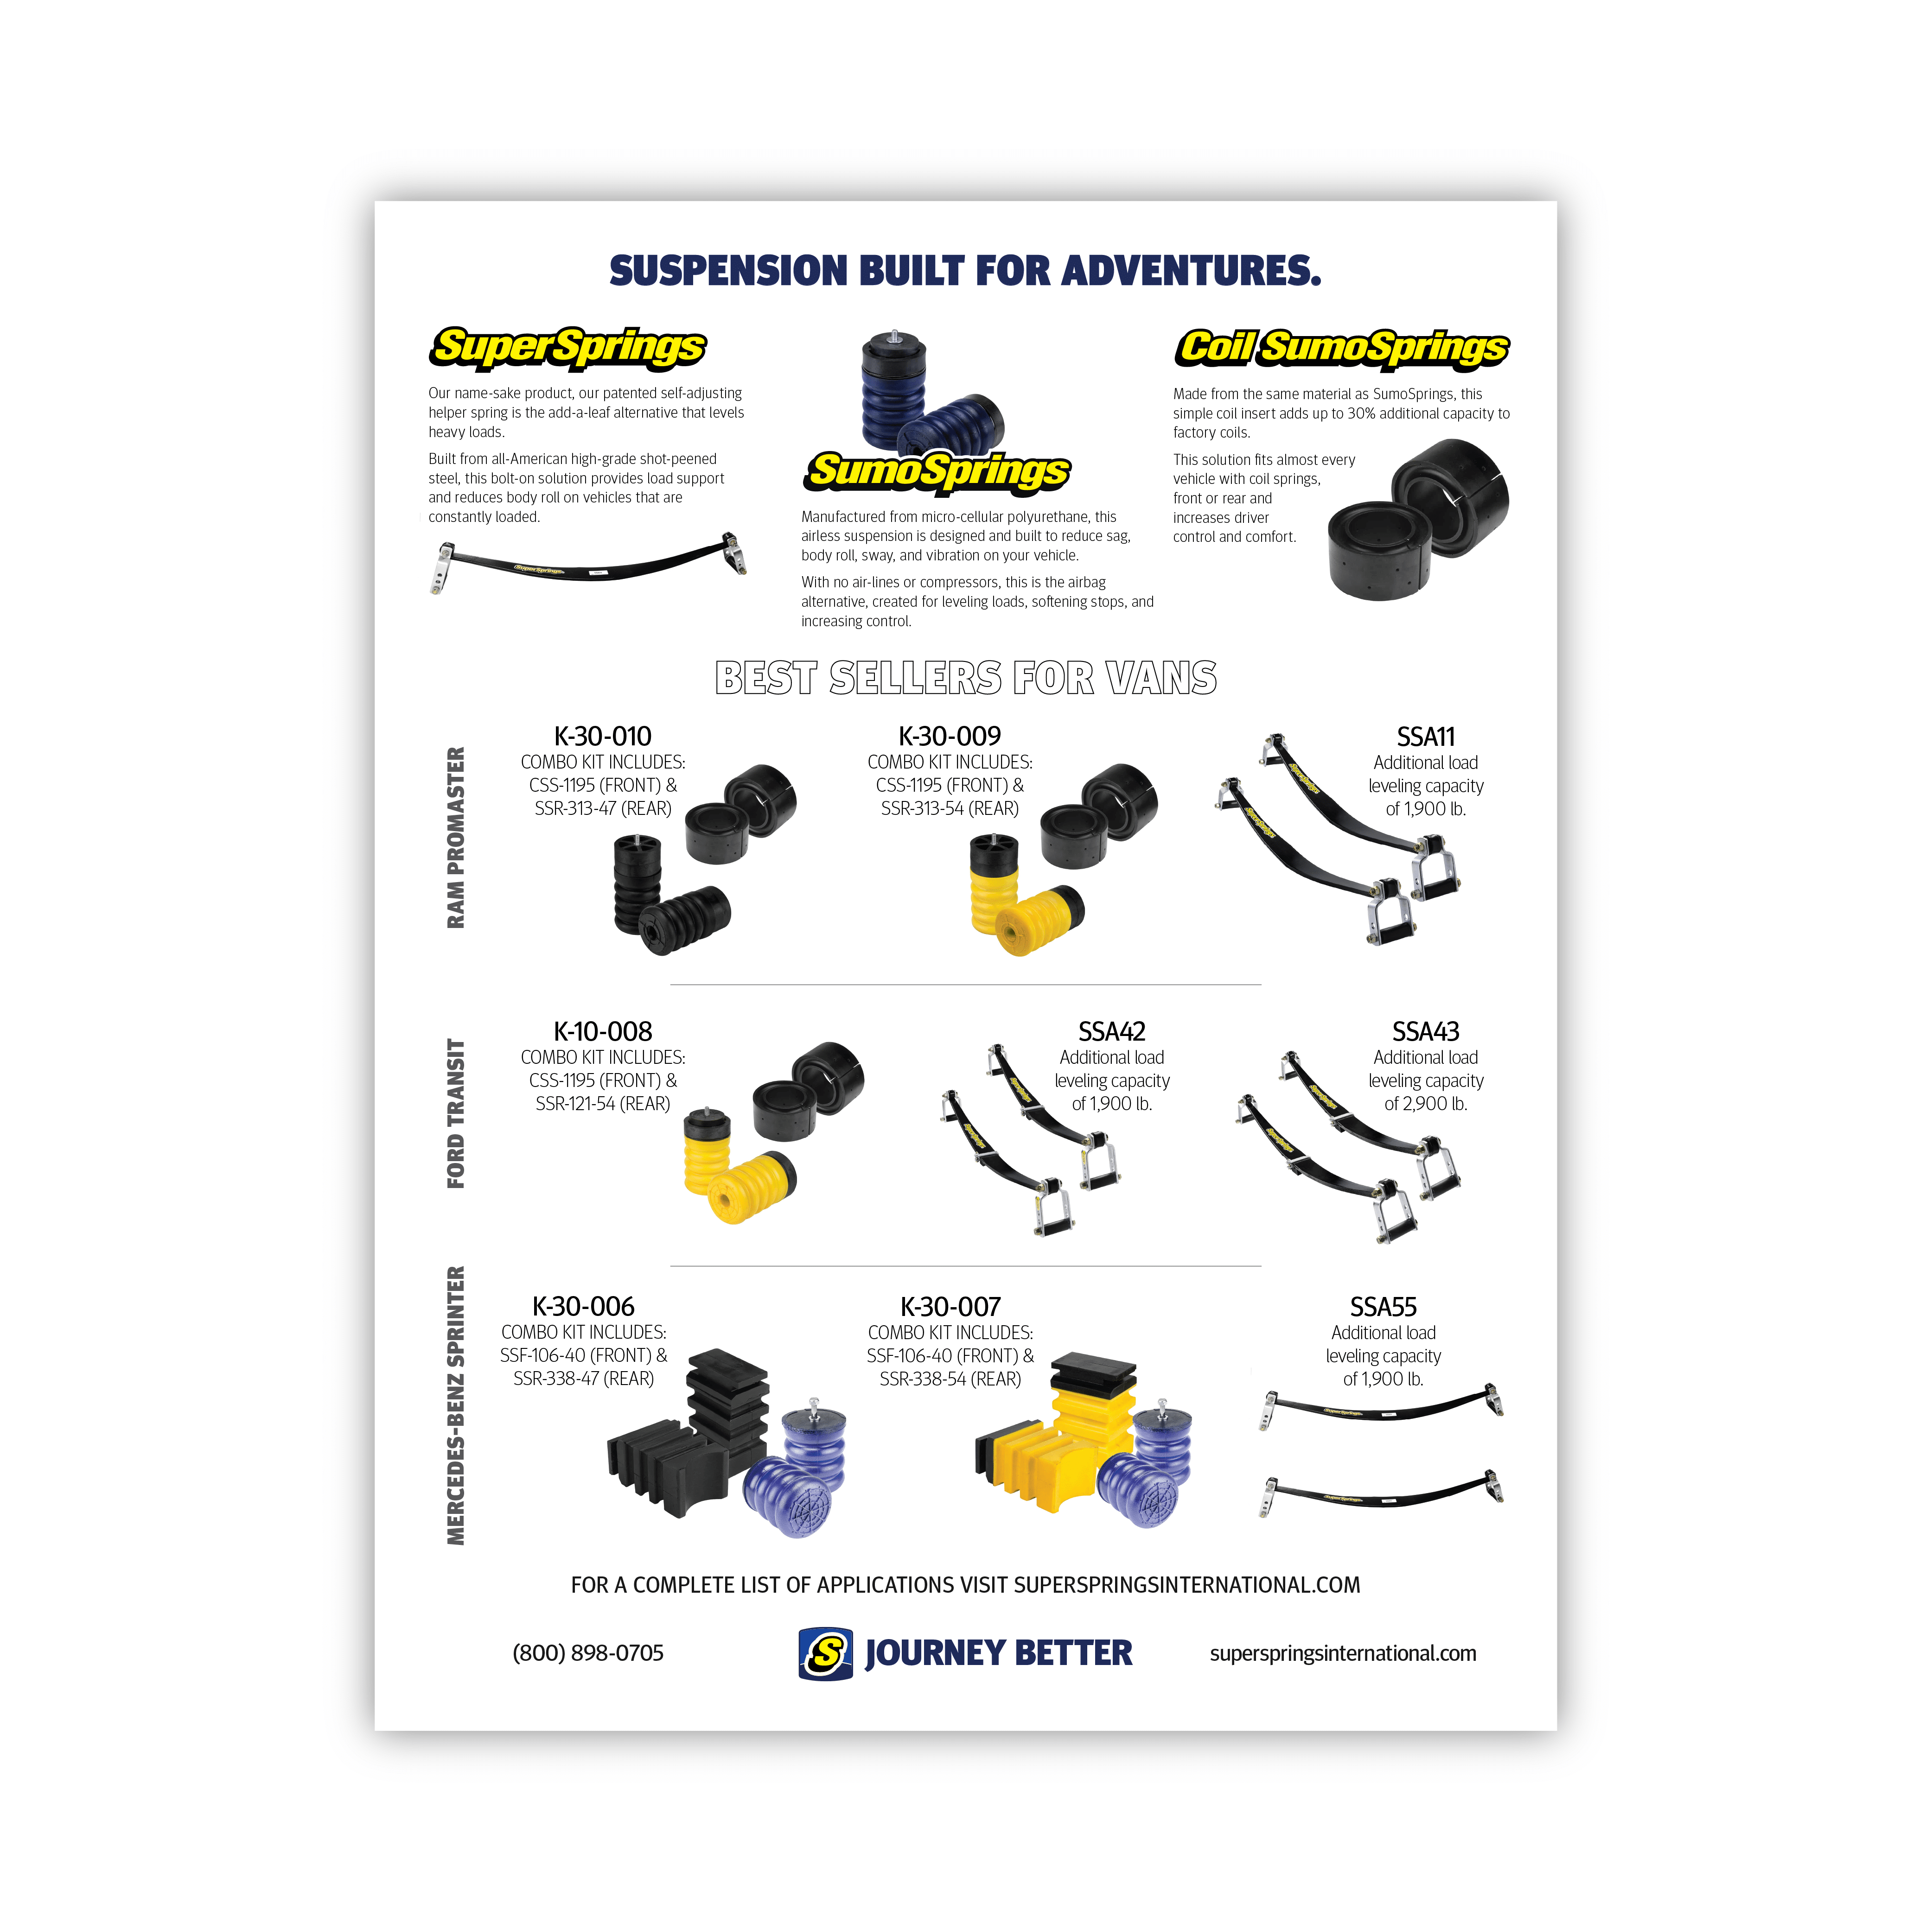
I wanted to start this post off by saying this: If you are looking for a suspension upgrade for your RAM Promaster or any van for that matter you’ve stumbled onto the right place. I want to tell you about SuperSprings Helper Springs. This is everything you’re looking for as far as upgrading your RAM Promaster suspension. I mean, there is always more to do with your suspension, but for now, I feel like this should be the foundation of your upgrade. Meaning, start with these and build on them. We are going to install the rear Sumo Springs on top of these when the time comes. As for right now, the installation of the SuperSprings has changed the game. Our RAM Promaster 2500 drives the way it did Pre-Build. It is AMAZING!!!
What SuperSprings Helper Springs Do
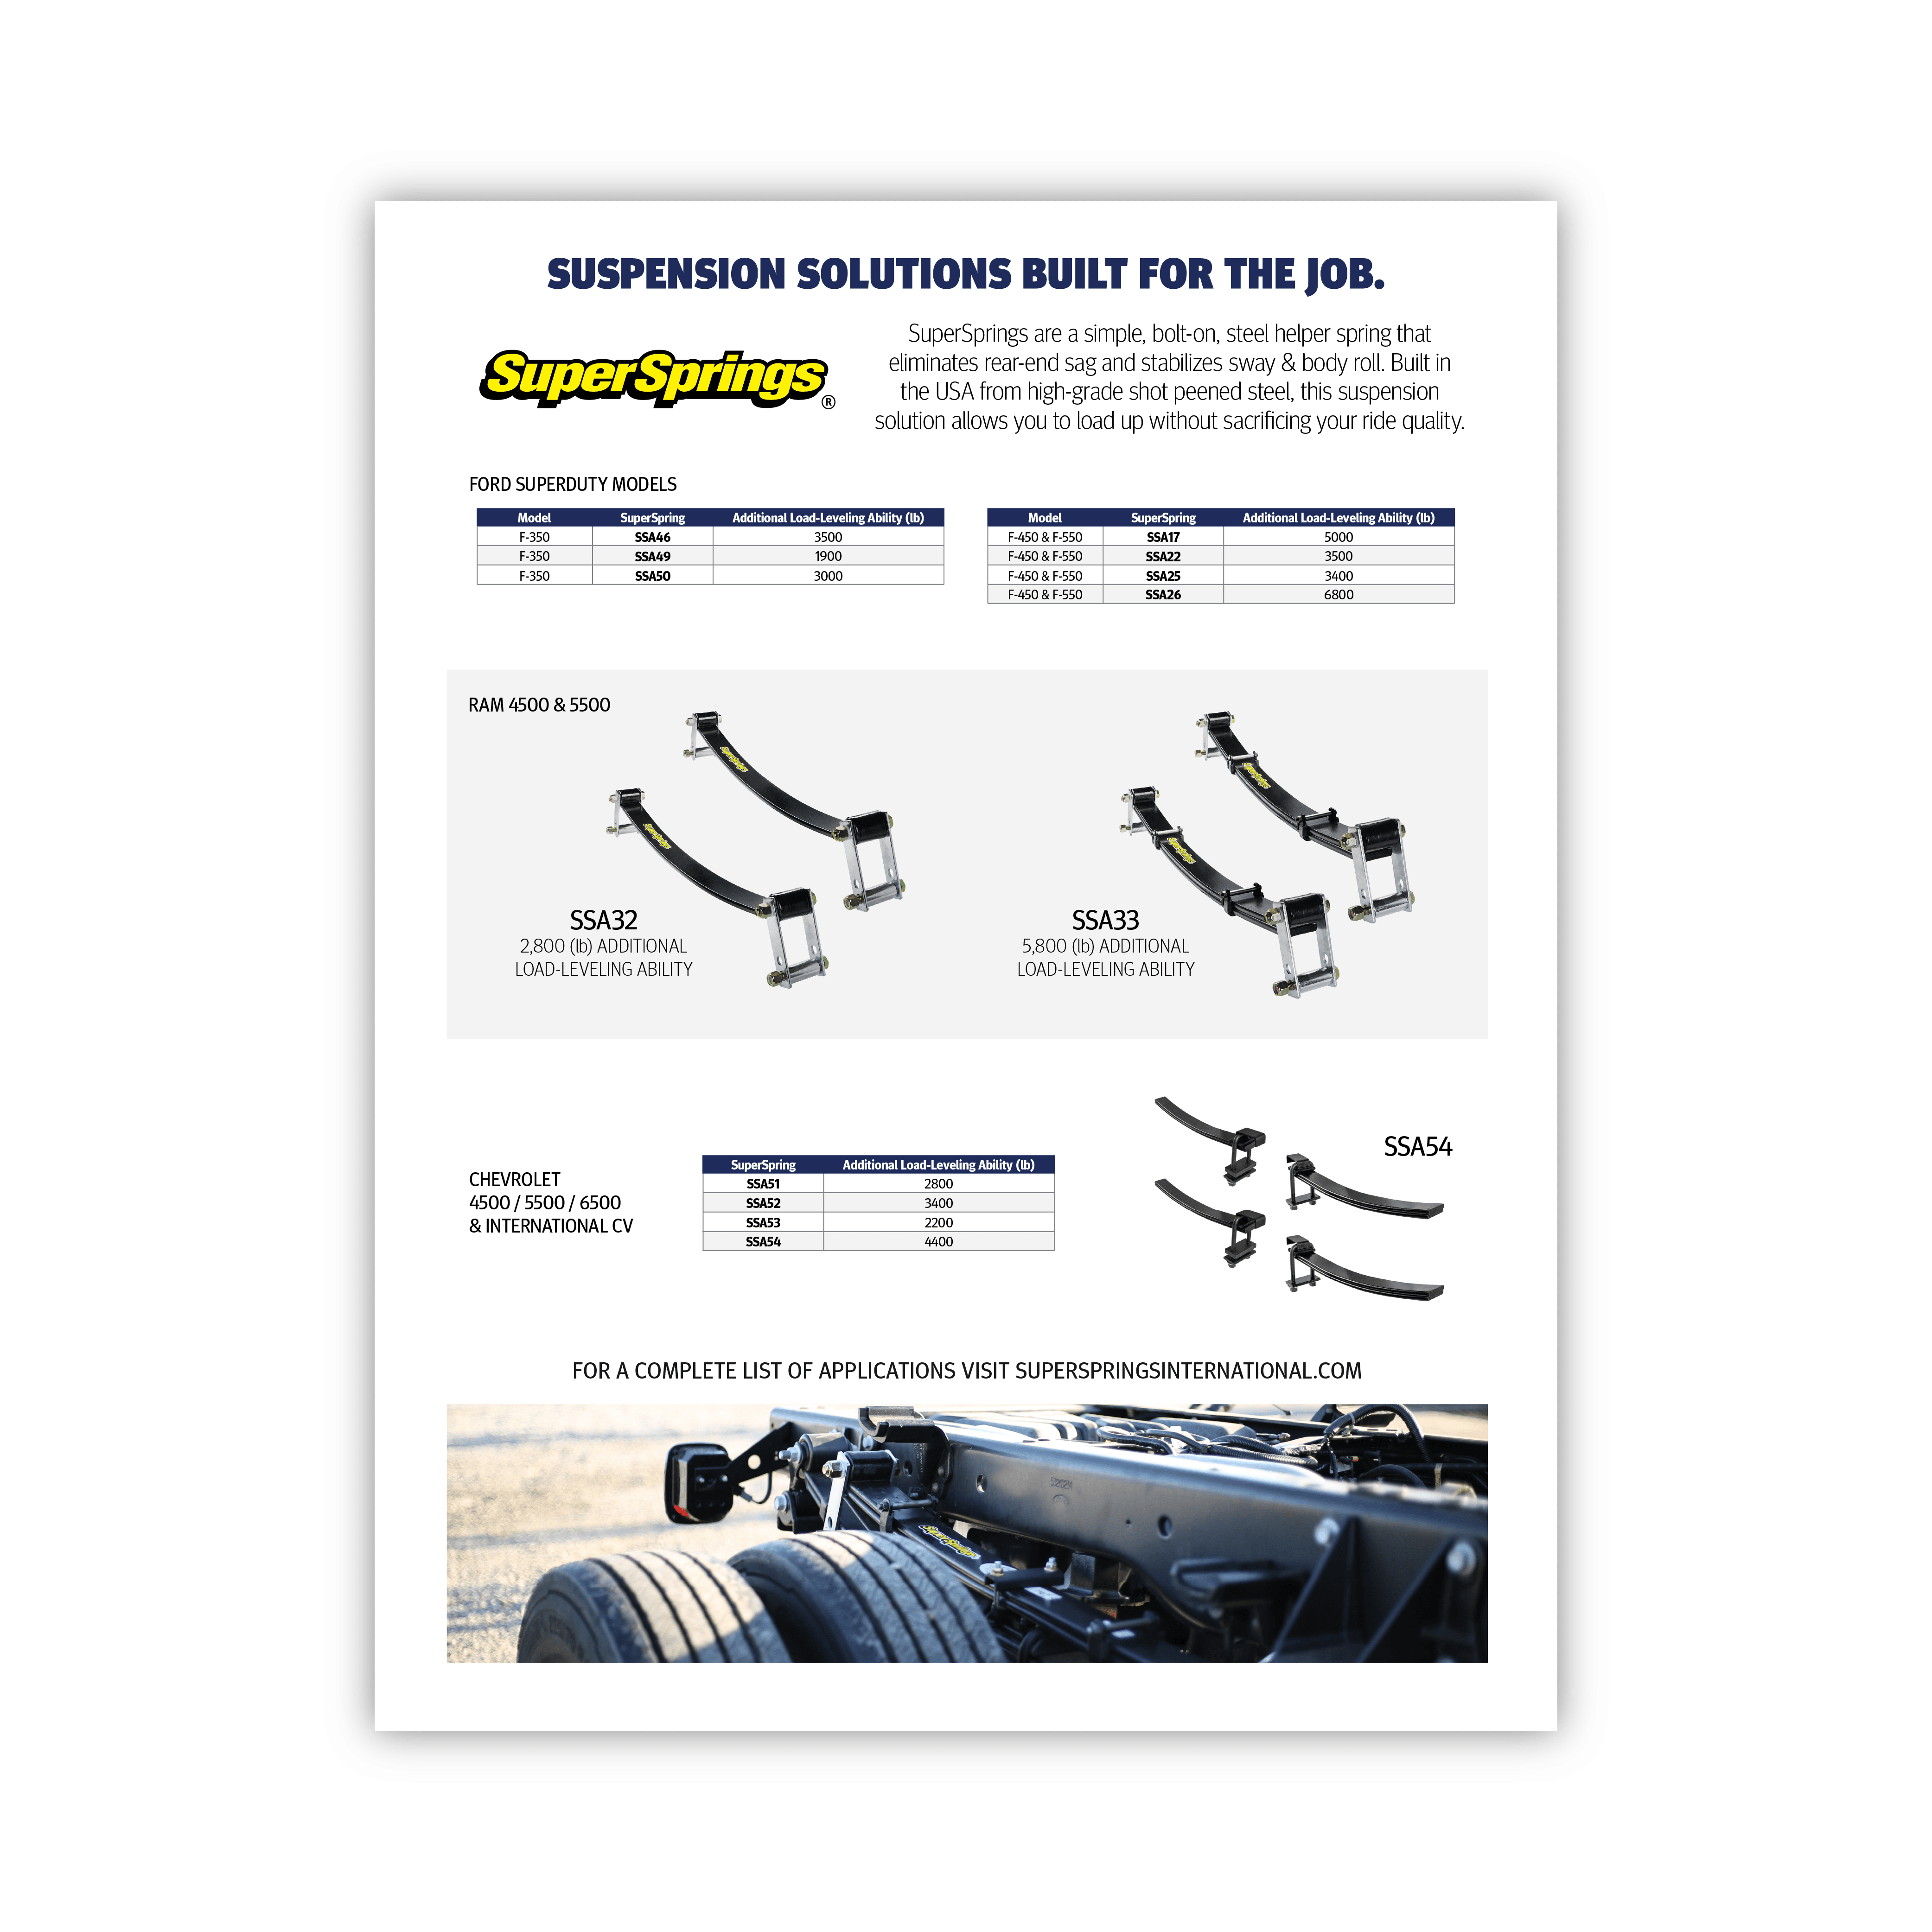
The SuperSprings Helper Springs add a preload tension to your existing leaf spring stack. The way they are designed is to pull against your existing leaf springs adding a 2000 lbs. leveling capacity to your vehicle. That doesn’t mean you can load up beyond the max capacity of the rating of your vehicle, it means that it will drive like you’ve reduced your build/belongings within the van by 2000 lbs. reducing sway and stabilizing your ride. Which is huge! Another great thing about these is, prevention-wise, will be protecting your factory leaf springs from fast wear. The leaf springs that are factory installed are not made for a constant heavy load going down dicey roads that I’m sure most van lifers like to go down, so, as we go down these roads with a home and belongings in them the factory leaf springs are naturally going to twist with the motion of the body of the van. With these springs installed, it will lessen the torque on the factory spring and bring longevity to the factory suspension system. It will also give an awesome lift to your vehicle.
You’ve got your SuperSprings, now what?
First off, CONGRATS!!! You’ve purchased yourself a sick-ass suspension upgrade for yourself! Grab a friend and some good tunes if you want to. This install is so easy you really don’t need someone else, but, it’s always more fun to throw tools around the room with a buddy if things go to shit than to do it alone.
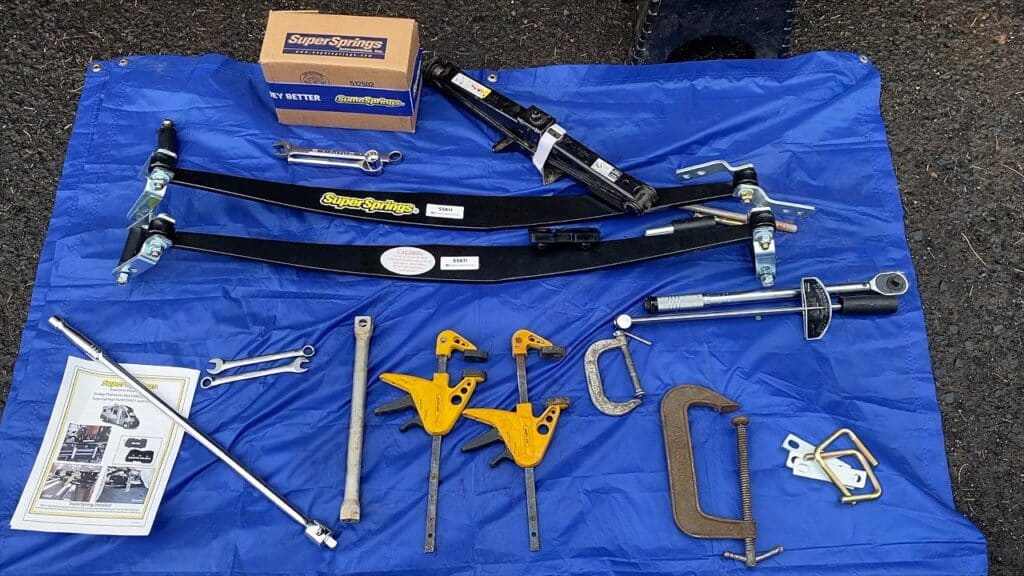
Tools you’ll need:
- A 3/4″ wrench
- A 3/4″ socket with ratchet (or just two of these without the wrench)
- A big ass “C” clamp
- Bottle Jack (If you have the factory jack get rid of that shit and get a bottle jack, please! The factory jack is for shit!)
That’s it!!! Yes… You read it right. That’s all you need for this install. Crazy right?
The Installation
Here are the instructions for the installation of the SuperSprings if you’re into that kind of stuff: SSA11
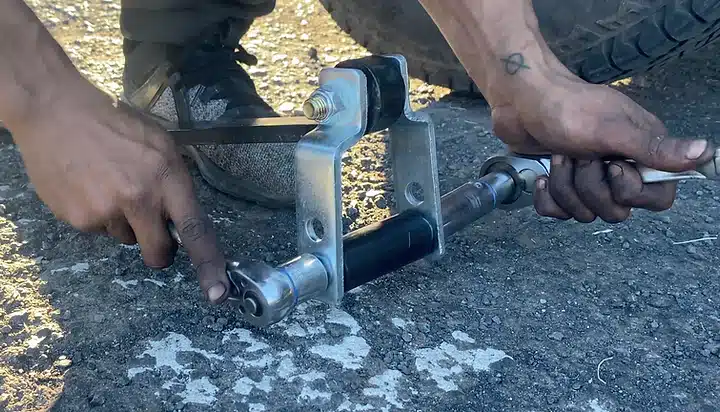
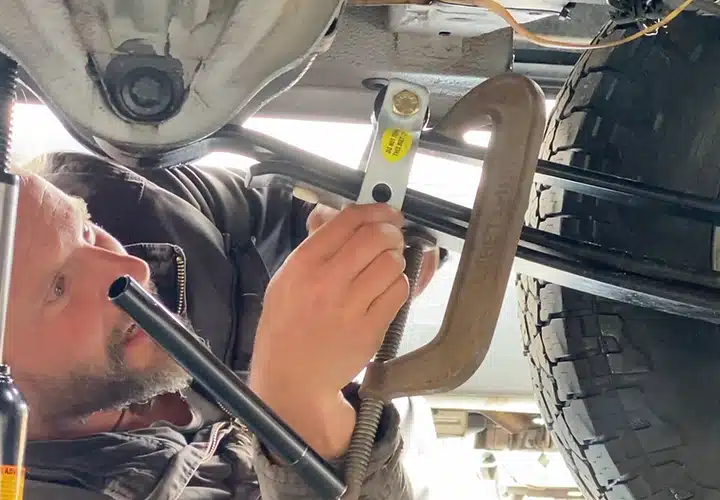
Before you install the springs figure out how much pre-tention you want applied to the existing leaf springs. This sounds more complicated than it is. The way we did it was the more weight your rig is carrying the more tension you’re going to want to put on there. Here is a picture of bolt placement for reference:
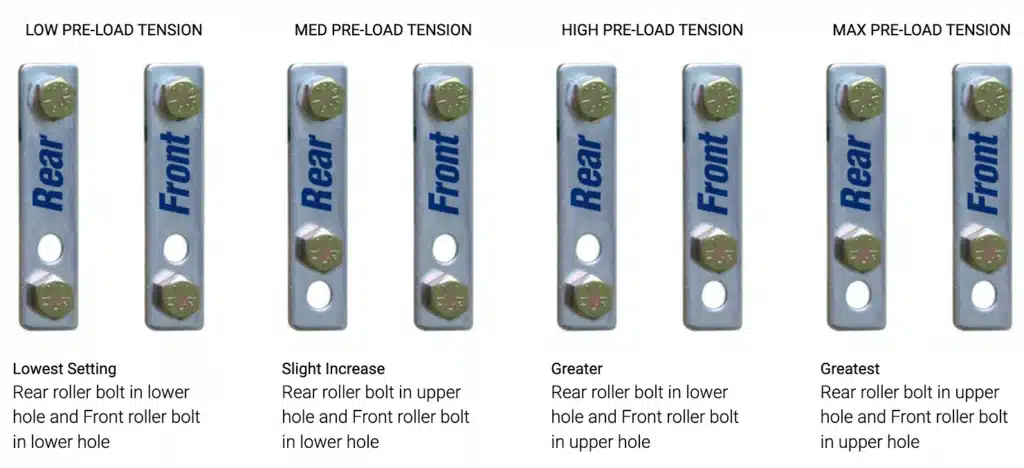
We went with a medium load tension because we are under max by say like 800 lbs. Our buddy JC with the 3500 in the video went with max preload tension because he was just under capacity. The amazing thing about these springs is that the adjustments are ridiculously easy to make if you aren’t satisfied with the ride. You can see how easy the adjustments are in the first video.
Now that you’ve figured out the settings you want to roll with here are the steps (It doesn’t matter which side you start with):
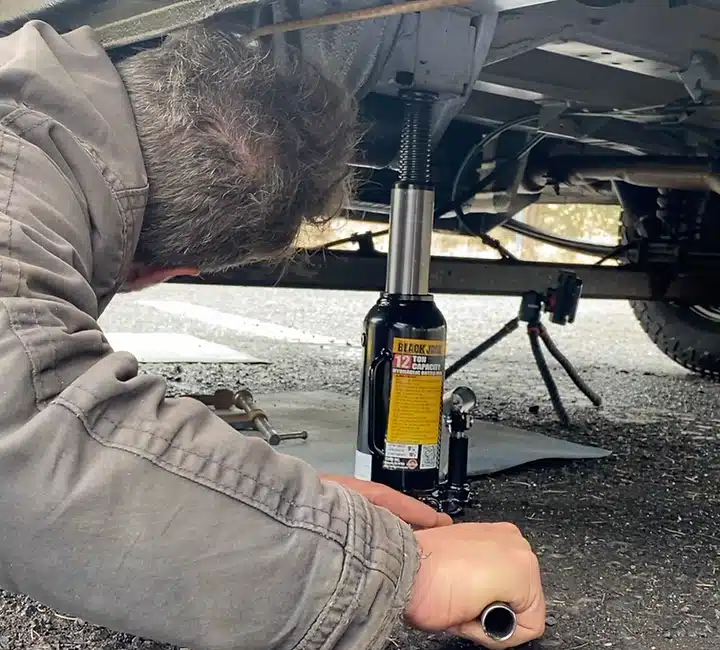
Step 1 – Crank on the E-Brake and jack that puppy up.
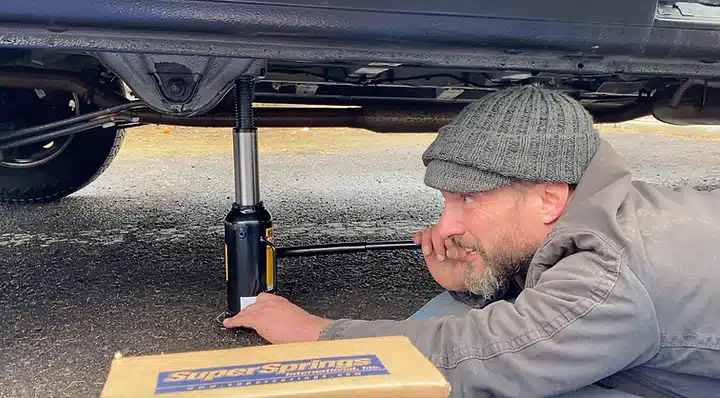
Tools needed – Bottle Jack – Pop on the e-brake and jack up your van. You only need to jack it up enough for the tire to be slightly off the ground. USE A BOTTLE JACK! If you don’t have a bottle jack for your van yet, please, go to Walmart and get one!!! I can’t stress this enough! The factory jack is a big steaming pile of shit and can not be trusted! I know this through experience.
Step 2 – Remove the Rollers
Tools needed – 3/4″ wrench and socket with ratchet – Here all your doing is prepping your new springs for an easy install. Take off those rollers with your 3/4″ wrench and ratchet and put them somewhere to have easy access for when you need to put them back on.
Step 3 – Place the Spacer
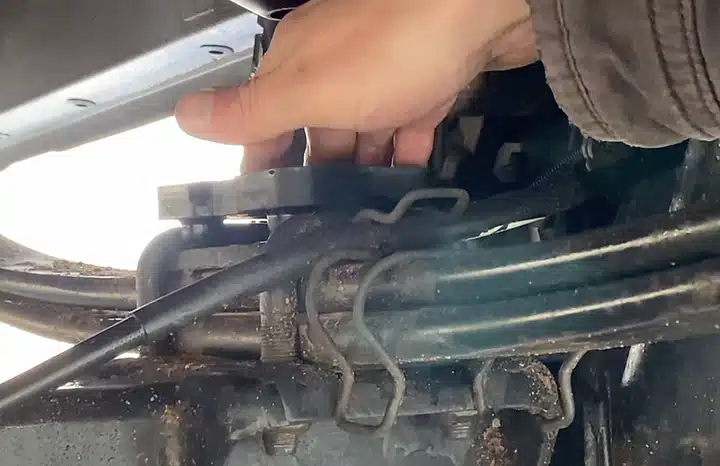
Parts needed – The black spacer that comes with the installation kit – Take your spacer and place it over the “U” bolts that are holding your factory leaf springs to your axle. Just make sure it is centered side to side.
Step 4 – Place the SuperSpring
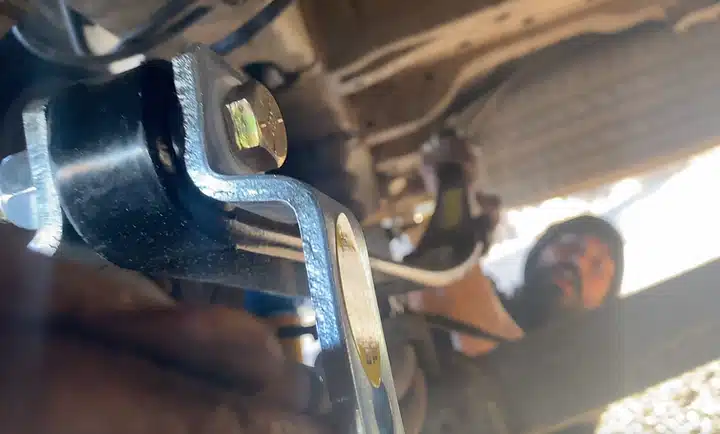
Parts needed – The SSA11 SuperSpring – Place the spring on top of your spacer and center it all to the factory leaf springs. If you have any obstructions front or back you can move your leaf spring forward and back i.e. 10:24 in video 1. The key to doing this is to make sure your front roller has at least a 1/4″ of un-obstruction forward and back and your rear roller has 3/4″ of un-obstruction forward and back to roll.
Step 5 – Put your first Roller on
Tools & Parts Needed – Roller & Hardware Removed in Step 2 and 3/4″ wrench and ratchet – Choose a side of the spring you want to start on and grab the roller, bolt, and nut that you took off in step 2. Pull the spring down so the bracket is on both sides of your leaf springs and the hole is low enough to place the roller under your leaf springs (this can be done with your hand) and put the roller, bolt, and nut in the bolt hole according to your Pre-Load Tension decision and crank them on.
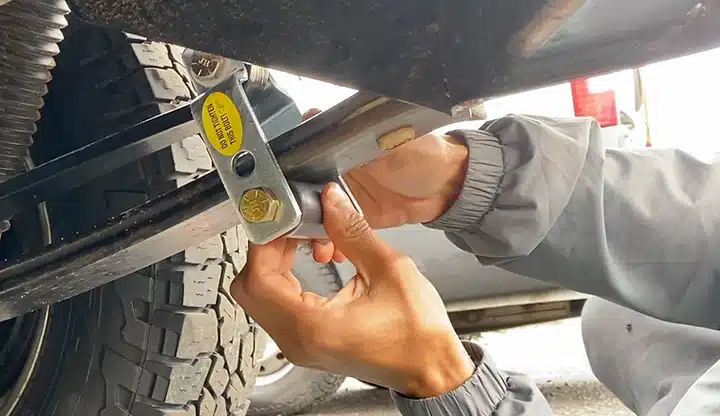
Step 6 – Put your Second Roller on
Tools & Parts Needed – Roller & Hardware Removed in Step 2, Big Ass Clamp, and 3/4″ Wrench & Ratchet – Now its time to get your clamp on this thing. Before you crank it down, make sure your spacer is still in the correct place. Now grab your clamp and wrap it around the SuperSpring and your factory springs and start cranking it down. You want to pull it down so the hole you decided on for pretension lowers past your leaf springs enough to slide the roller and bolts through. Once you’ve done that put the nut on and crank that shit tight! Once it’s cranked on remove your clamp. That’s it!
Step 7 – Lower your Rig
It’s time to lower you van! Keep an eye on it when it’s lowering to make sure the brackets aren’t going to scrape on anything. We had a bit of an issue with our trailer hitch, but, most installs are not going to have any issues. CONGRATS!!! The first side is done!
Step 8 – Rinse andd Repeat for Side 2!
This is a rinse and repeat of all the steps for the second side. At this point you’re going to be a pro at this, so, have fun with the second side. For shits and giggles you could time yourself, too. You’ll be surprised at how fast and easy these are to install.

Check out the installation video:
Sign Up for More Tips, Adventures, and Exclusive Offers
Embark on a better journey with SuperSprings International. Sign up for our newsletter to receive professional tips, product updates, and exclusive offers.
PART TWO – Coil SumoSprings in the Front
This part isn’t going to be super long because the installation of the Coil SumoSprings are ridiculously easy.
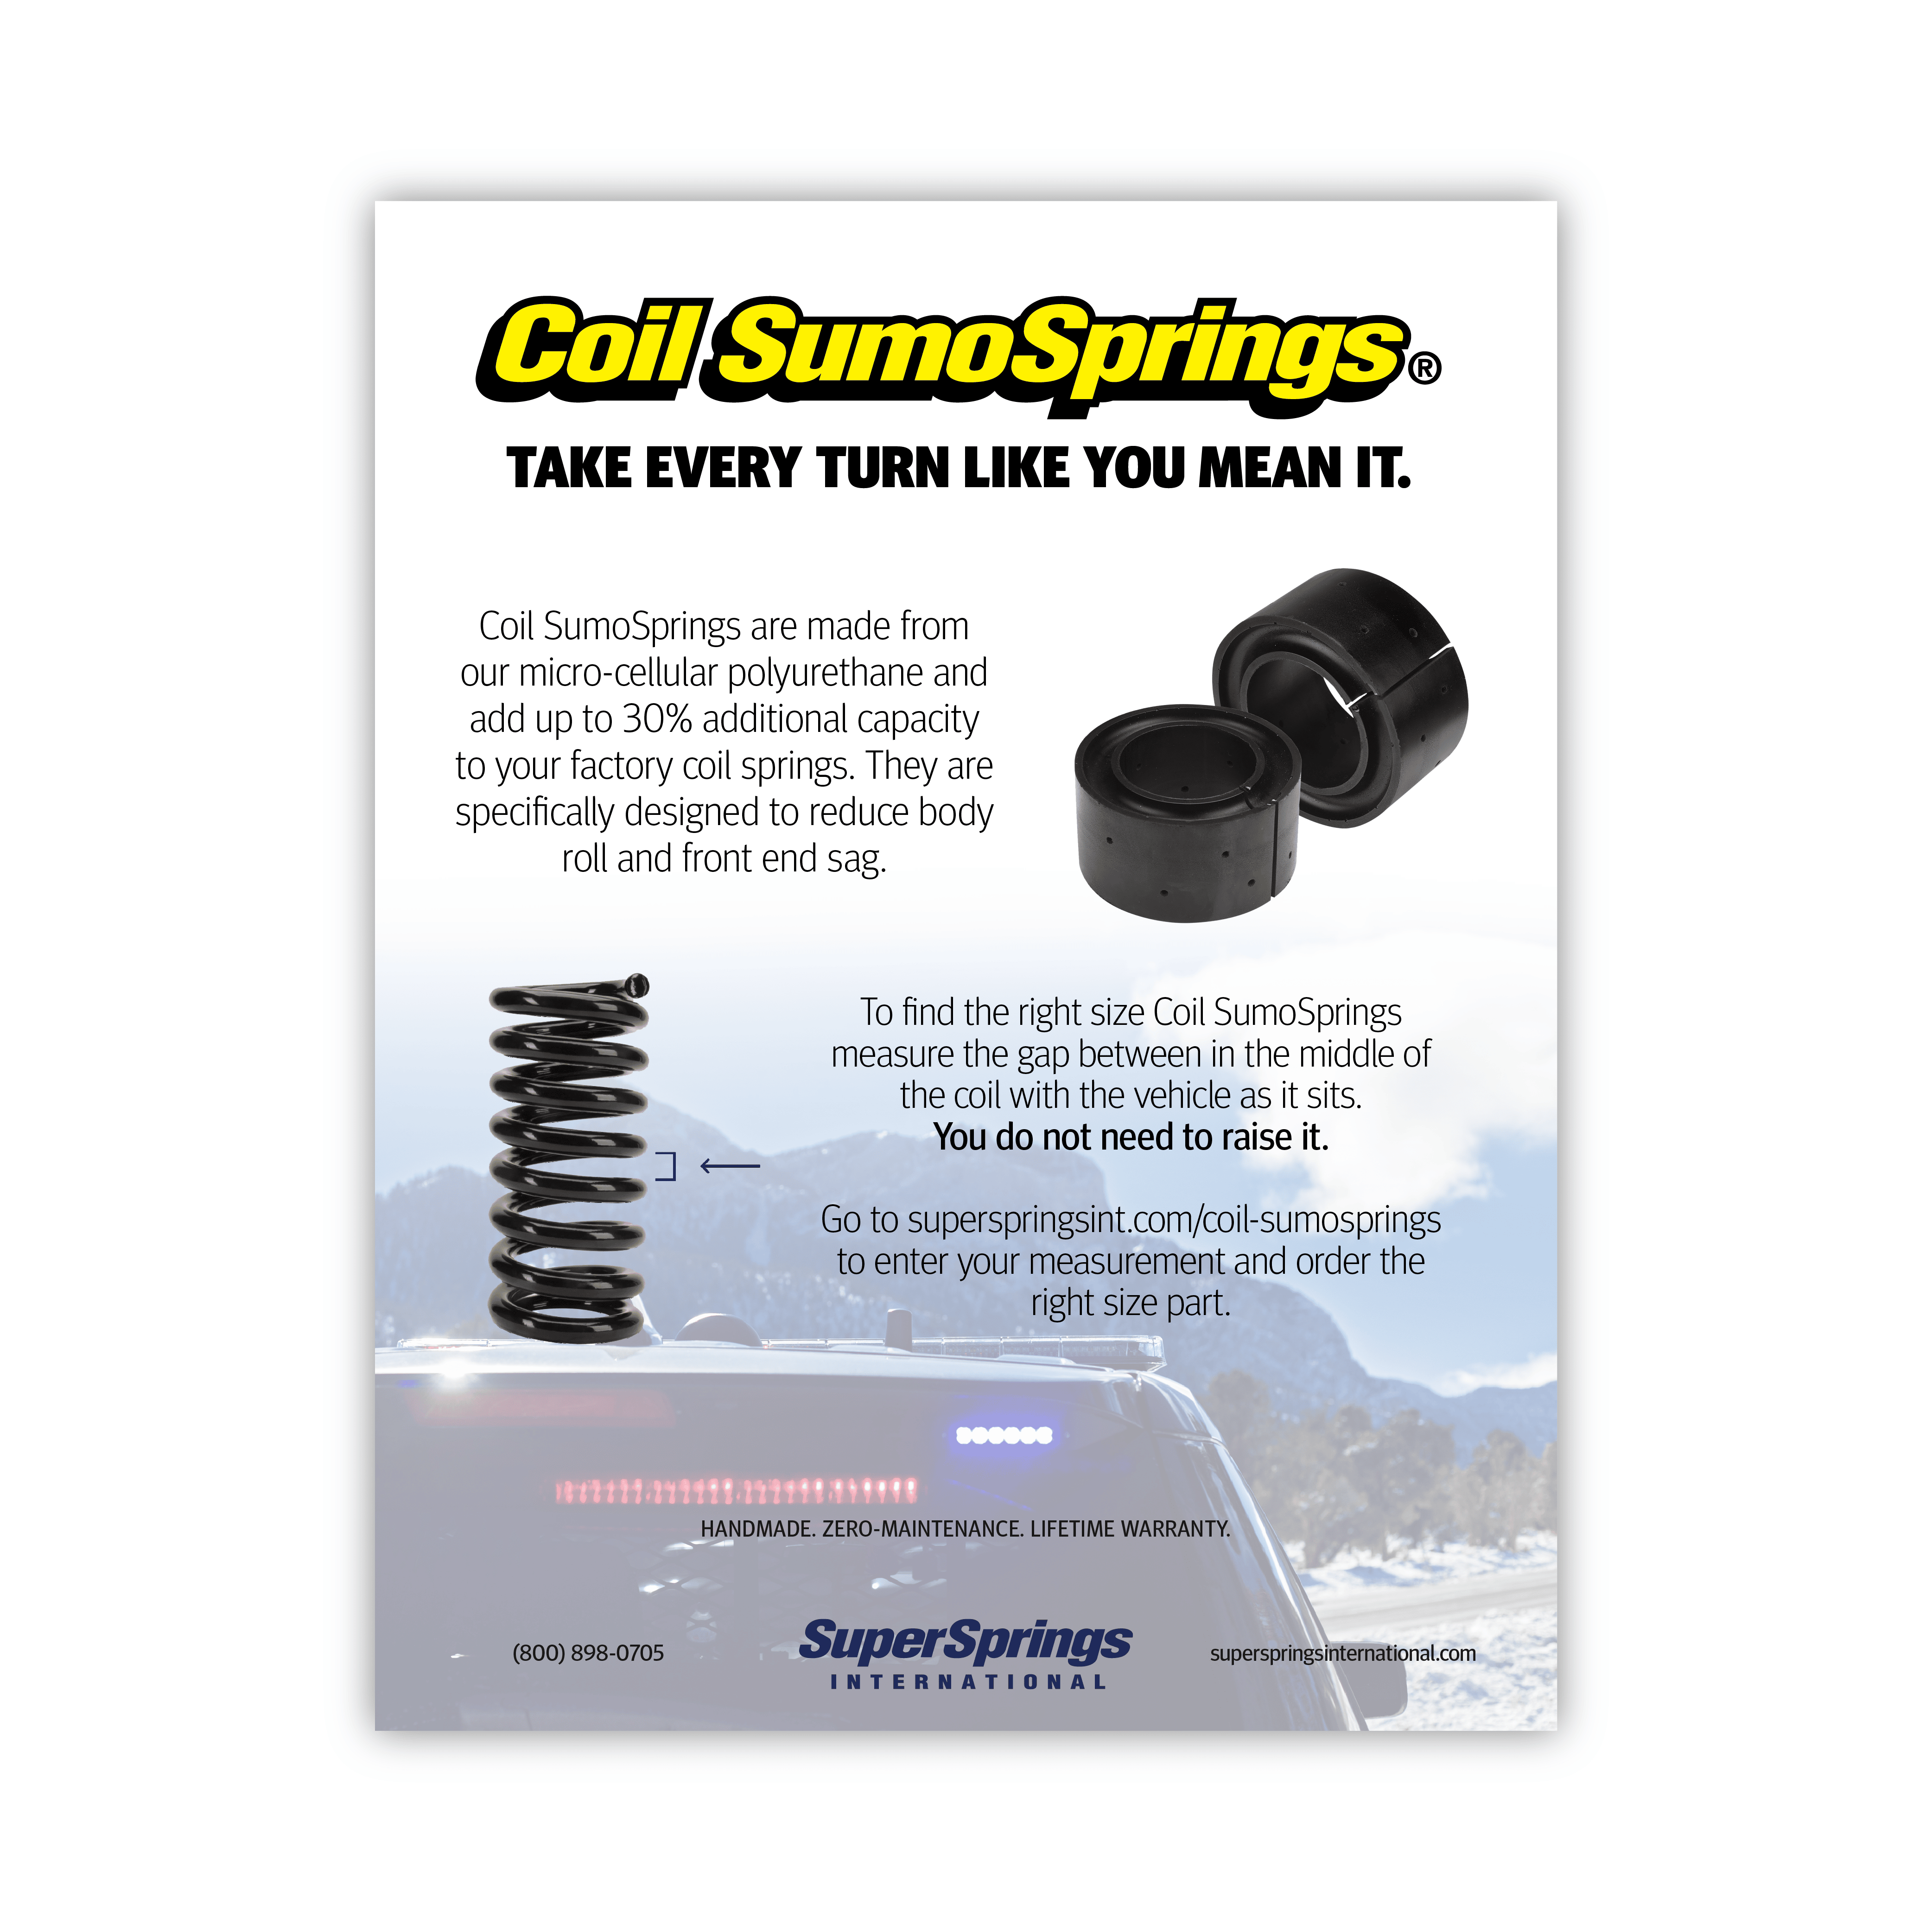
What Coil SumoSprings Do
The front coil SumoSprings reduce the compression of your springs and struts by 30% which increases the life of your front suspension system incredibly, so, for the price of the parts and the labor involved in installing them is hands down (in my opinion) worth every penny and second of time!
Installing Your Coil SumoSprings
This is seriously the easiest install you could ever do for yourself. I could try to. milk it and get wordy and drag out the steps just to fill up space, but, I’m not going to.
Tools You’ll Need
- Bottle Jack
- Hands
That’s it!!!
The Installation
Here we go! Brace Yourself!!!
Step 1 – Crank on the E-Brake and jack that puppy up.
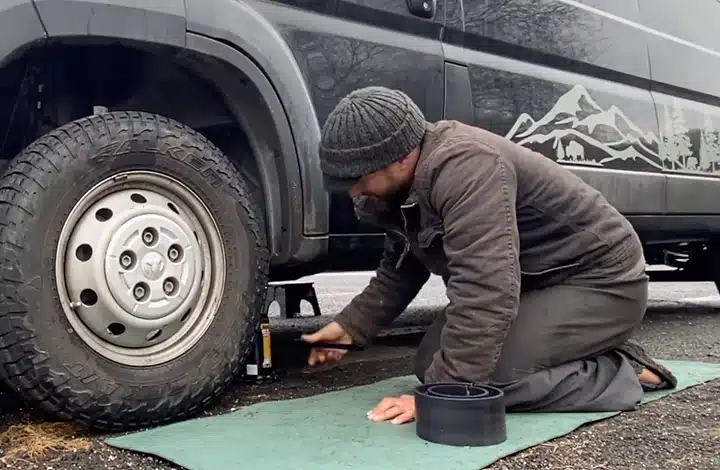
Tools needed – Bottle Jack – Pop on the e-brake and jack up your van. You only need to jack it up enough for the tire to be slightly off the ground. USE A BOTTLE JACK! If you don’t have a bottle jack for your van yet, please, go to Walmart and get one!!! I can’t stress this enough! The factory jack is a big steaming pile of shit and can not be trusted! I know this through experience.
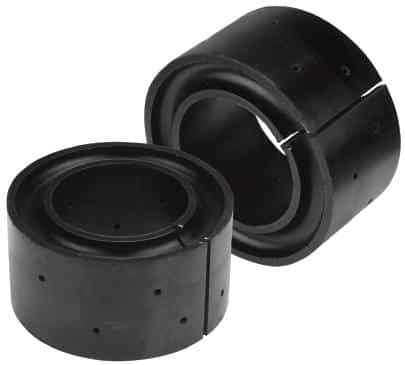
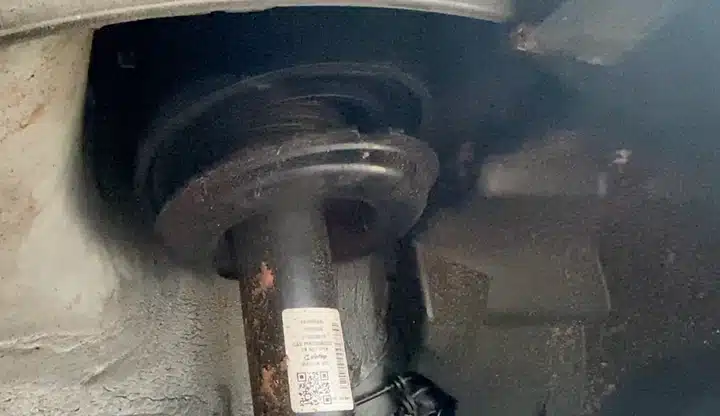
Step 2 – Work that Coil SumoSpring into Your Spring
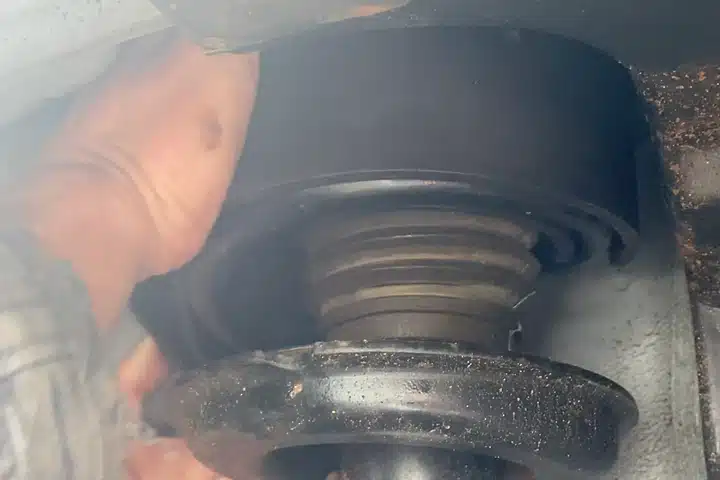
Tools & Parts needed – Hands and Sumo Spring – All you’re going to do here is take the Sumo Spring and bring it up to your spring and work it in. Push the top in first and work the bottom in after turning the SumoSpring as you work it in.
Step 3 – Lower the Jack
It’s time to lower you van! Keep an eye on it when it’s lowering to make sure the SumoSprings don’t pop out. CONGRATS!!! The first side is done!
Step 4 – Rinse and Repeat for Side 2!

This is a rinse and repeat of all the steps for the second side. At this point you’re going to be a pro at this, so, have fun with the second side. For shits and giggles you could time yourself, too. You’ll be surprised at how fast and easy these are to install.
Check out the installation video:
CONGRATS!!! You are all Done with your Kick Ass Rear Suspension Upgrade!!!
Seriously, enjoy the ride it is going to roll like brand new!
ABOUT JESSIE, BILLY & SEDONA OF NOMATTER WHERE VAN

Hi! We are Billy and Jessie, a full-time #VanLife couple, along with our pup Sedona. We have been living in our self-converted Promaster since May 2019 & see no end in sight. Originally from Boston, Massachusetts, the open road has called to us for a very long time. As Adventurers through & through, we enjoy everything from hiking, backpacking, rock climbing, paddle boarding, and cra making. If you see us while traveling, come and say hello! We love meeting fellow Adventurers. See you down the road. Follow their travels and van life journey on YouTube and Instagram @NomadderWhereVan.
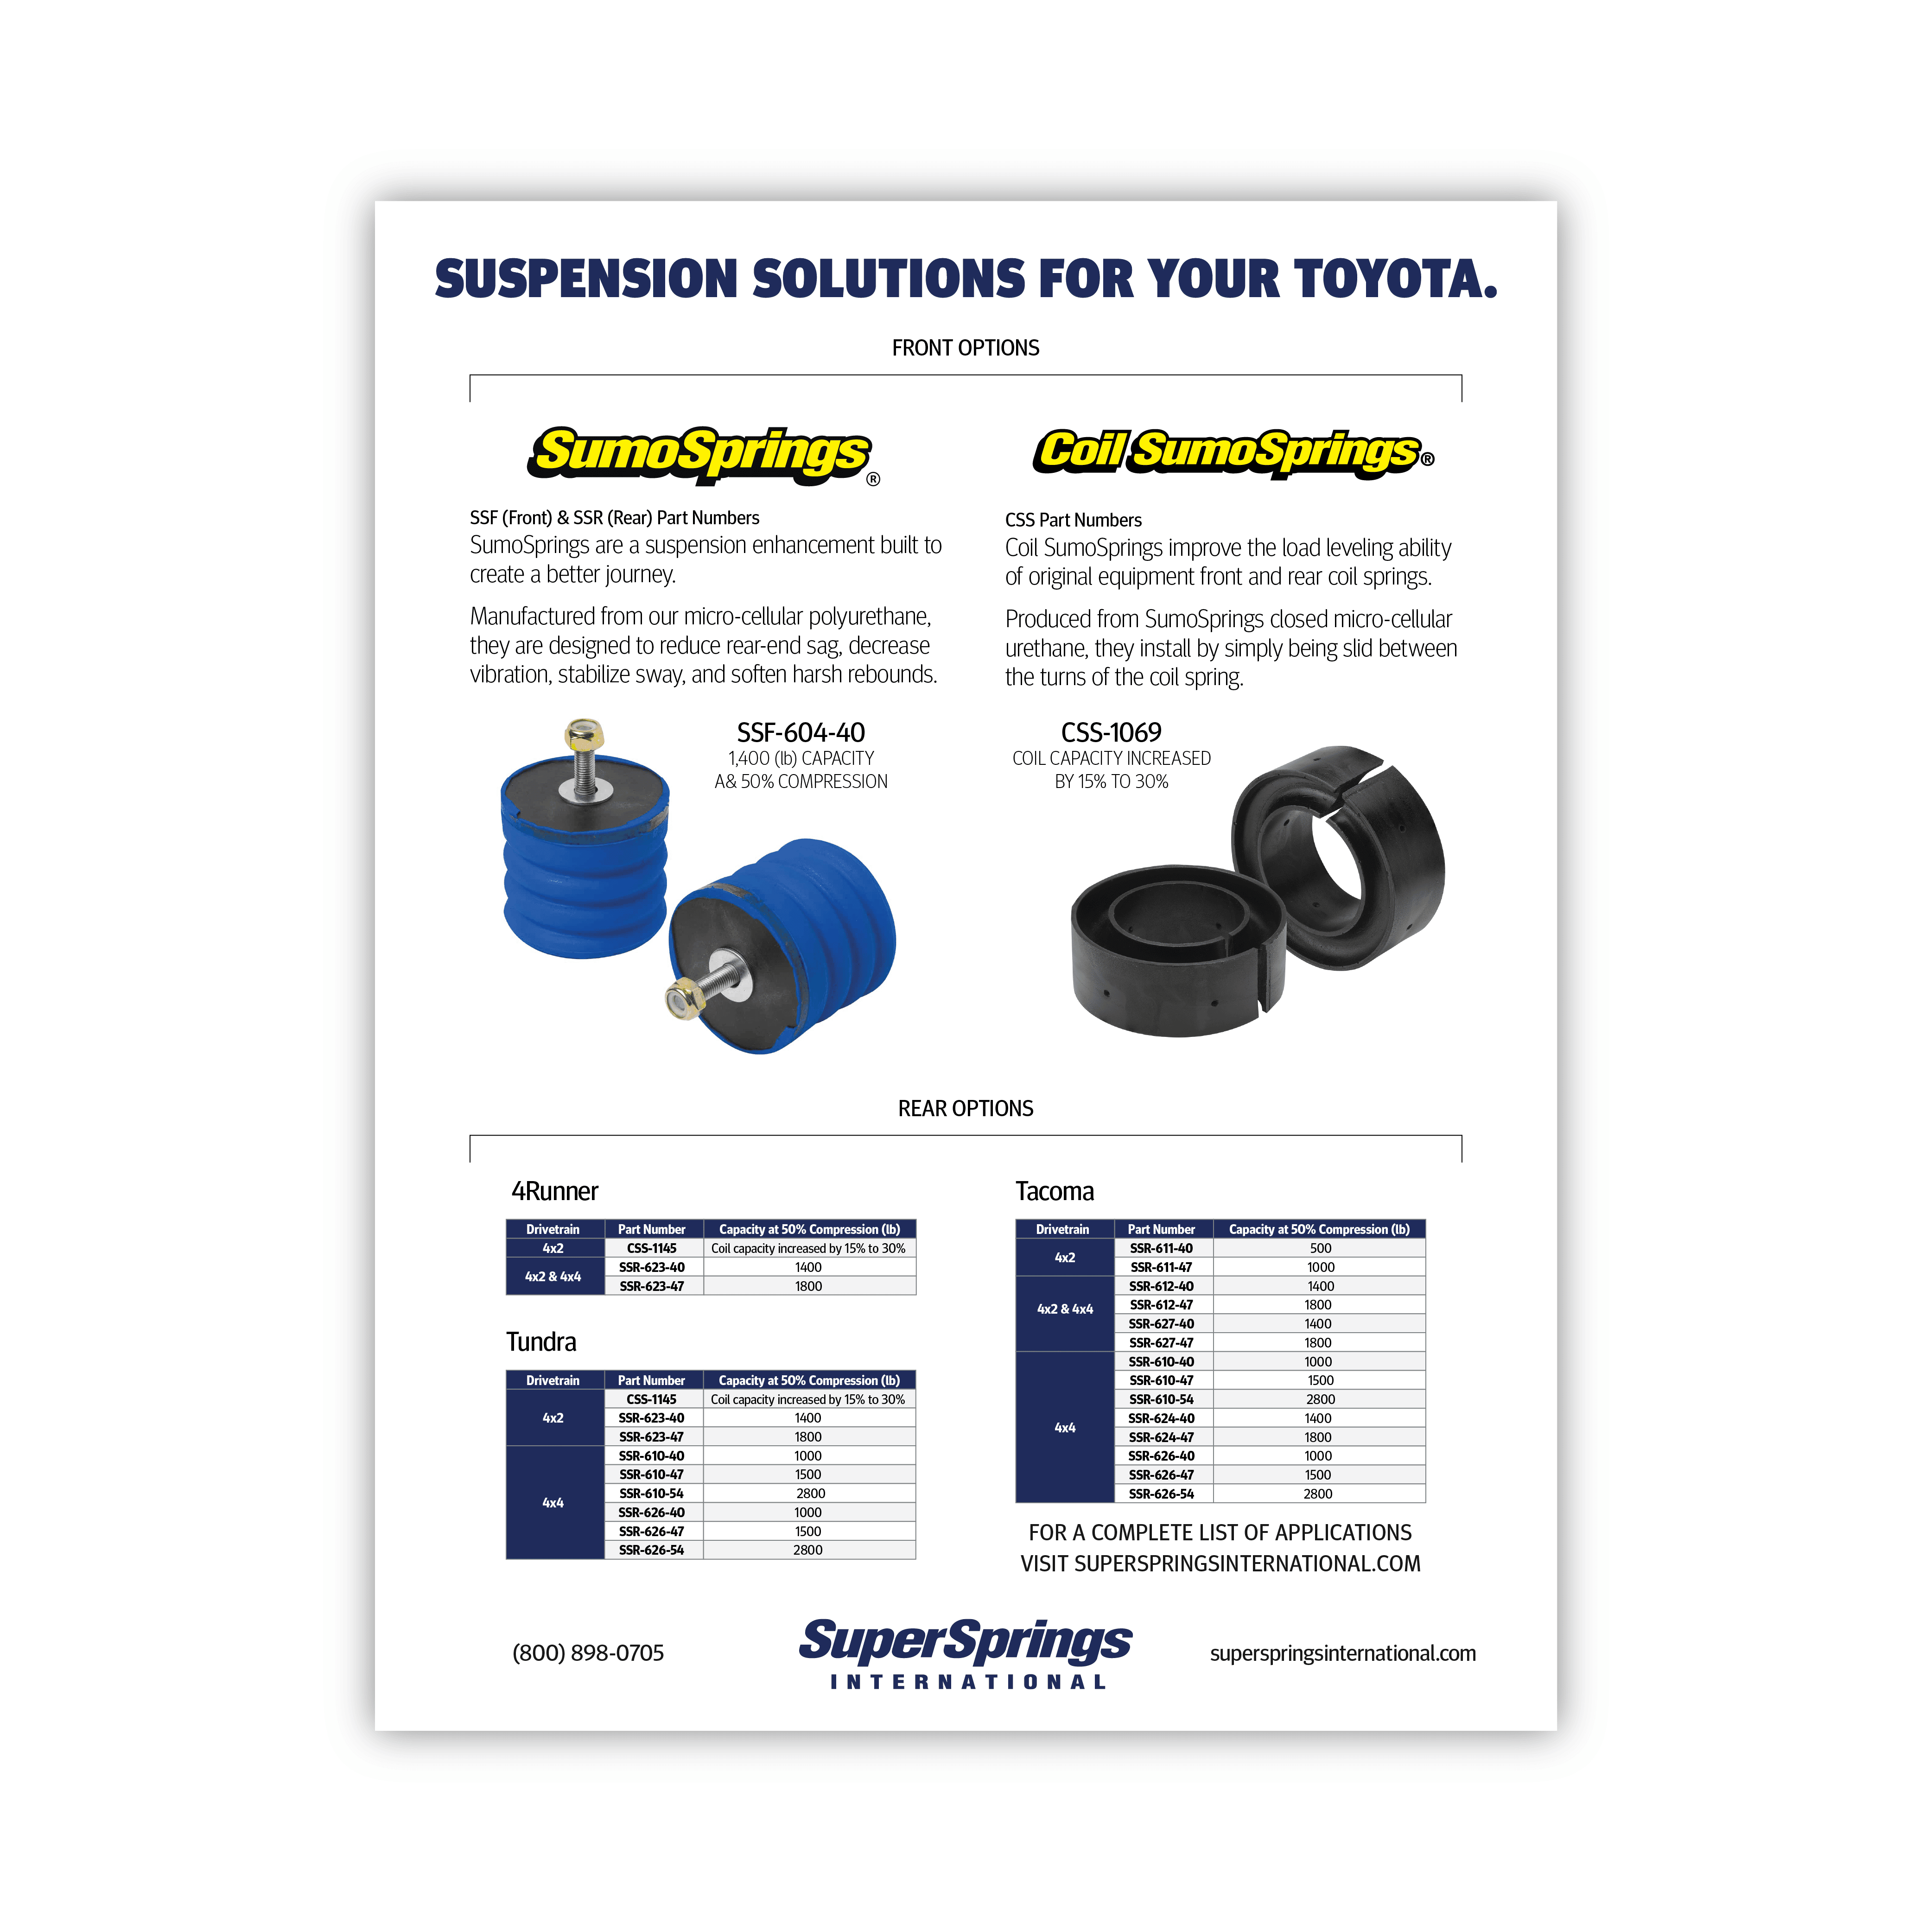
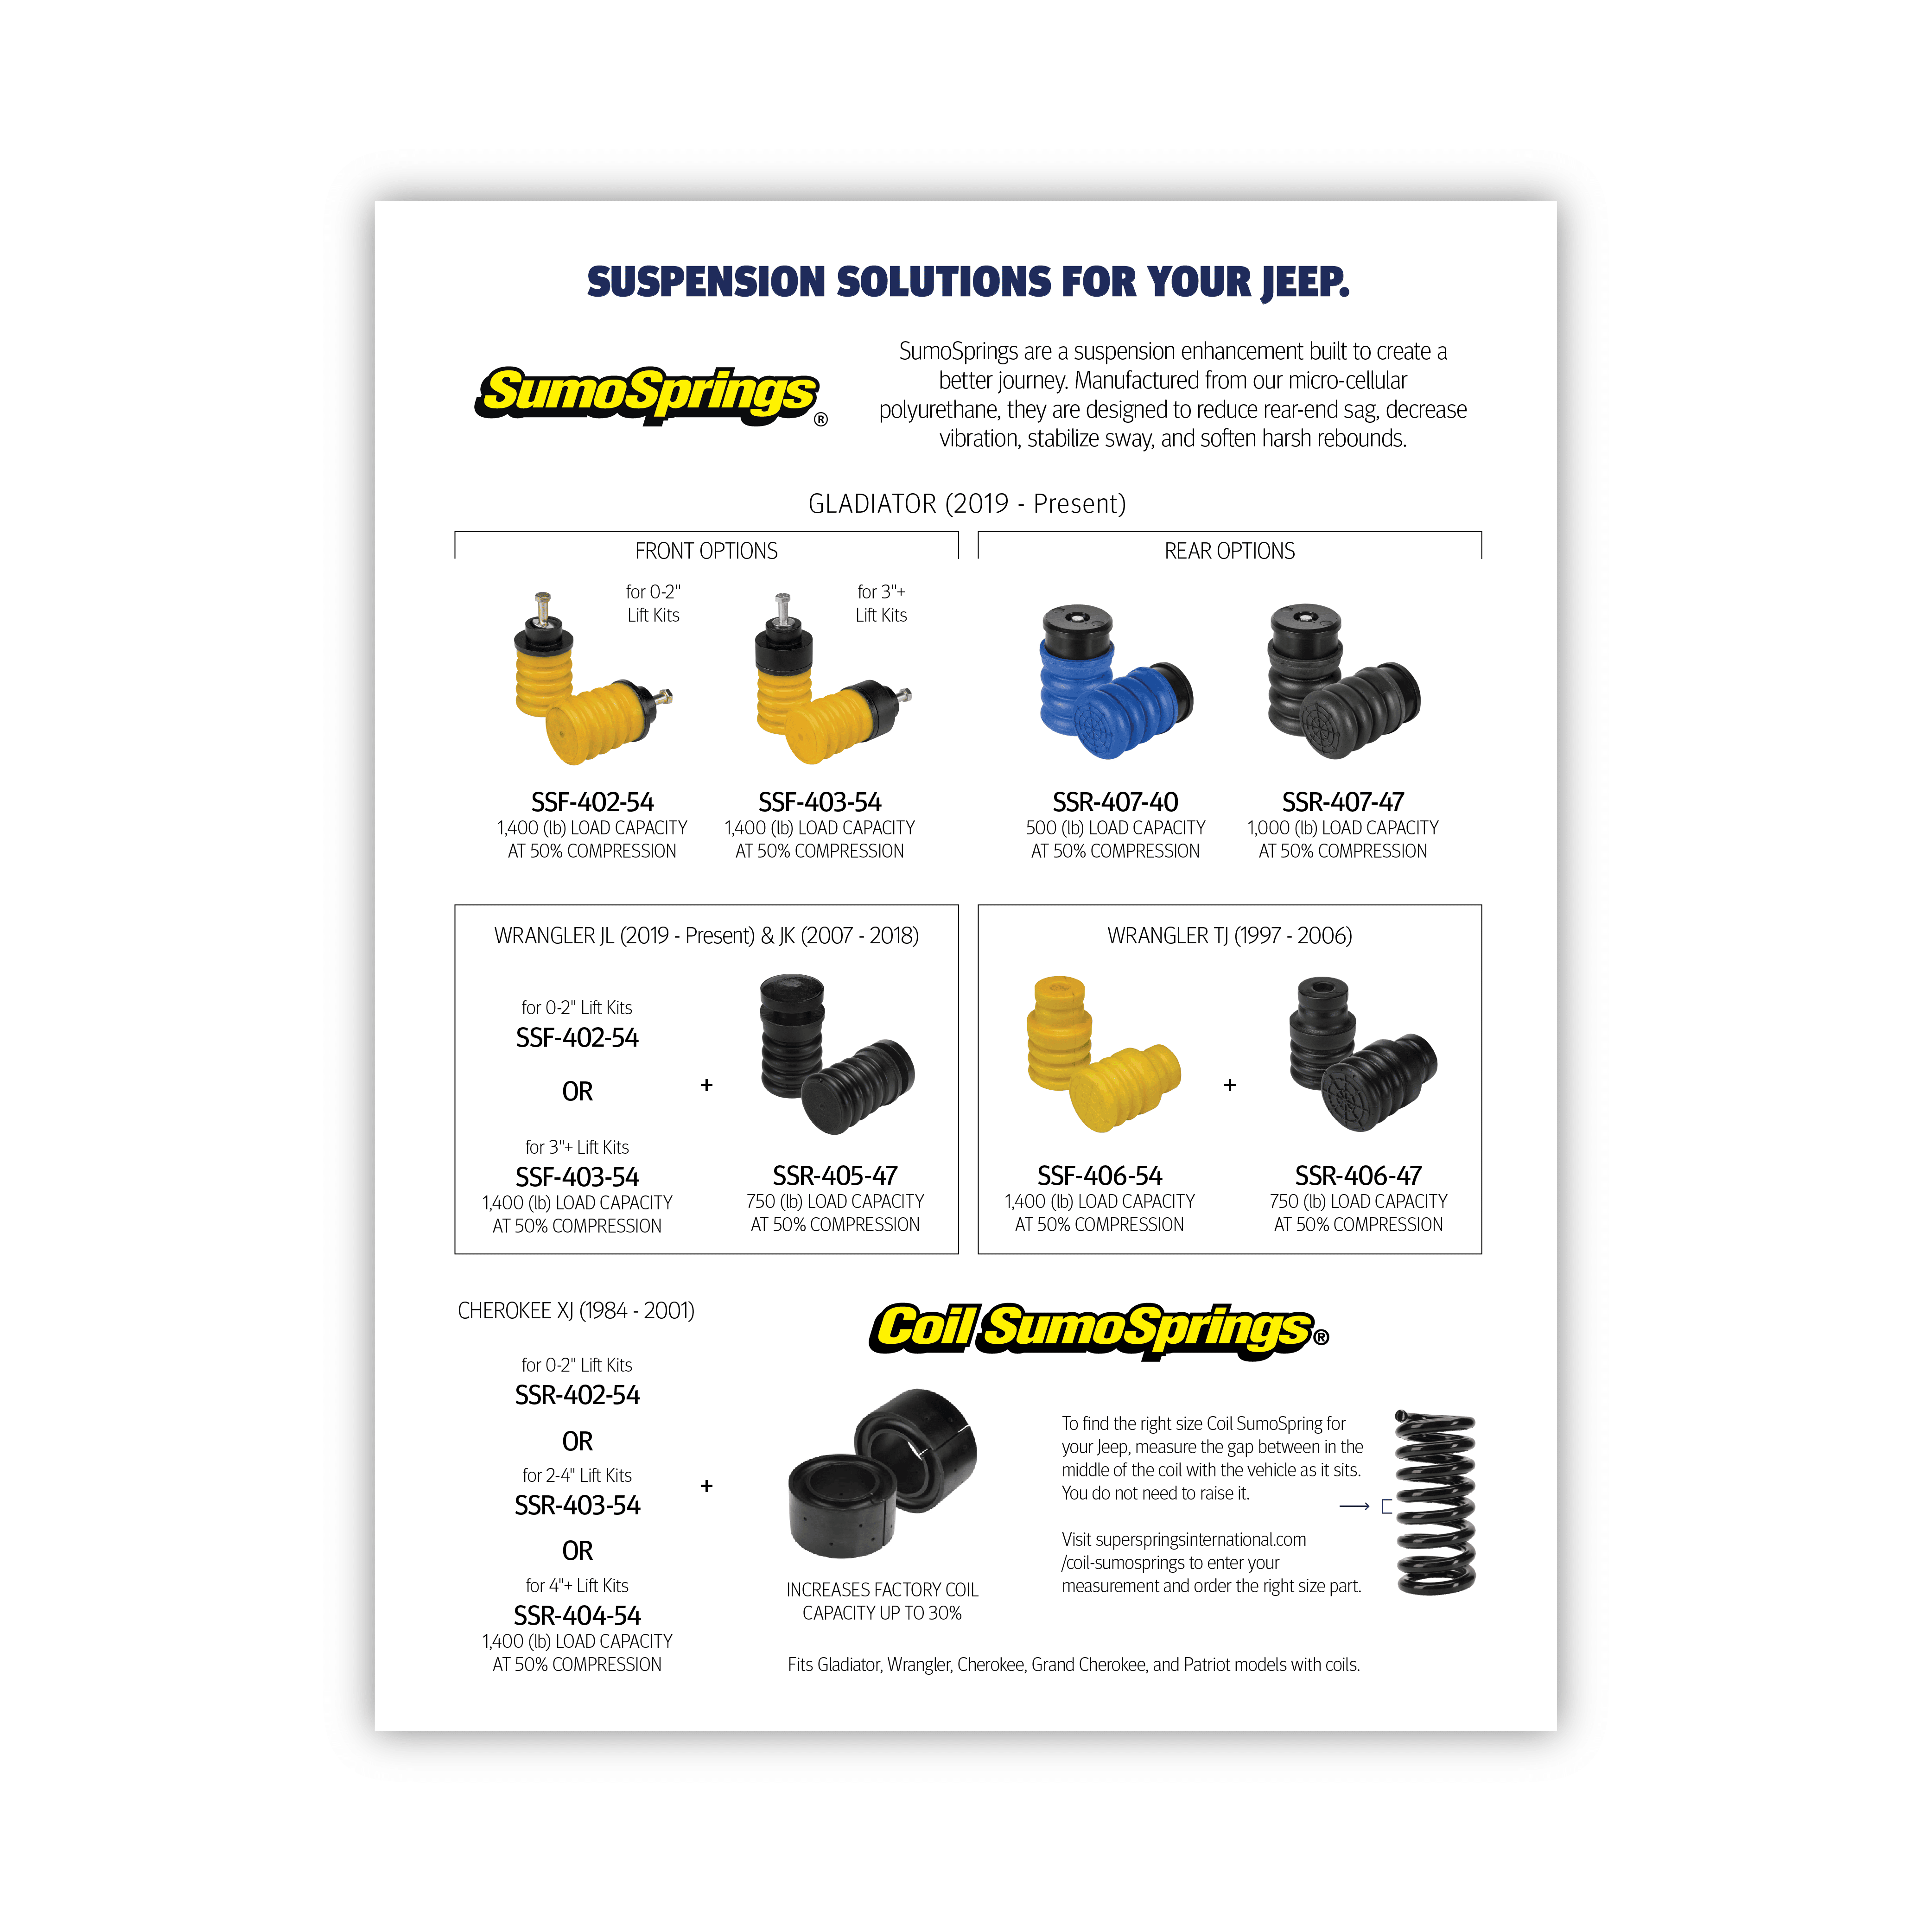
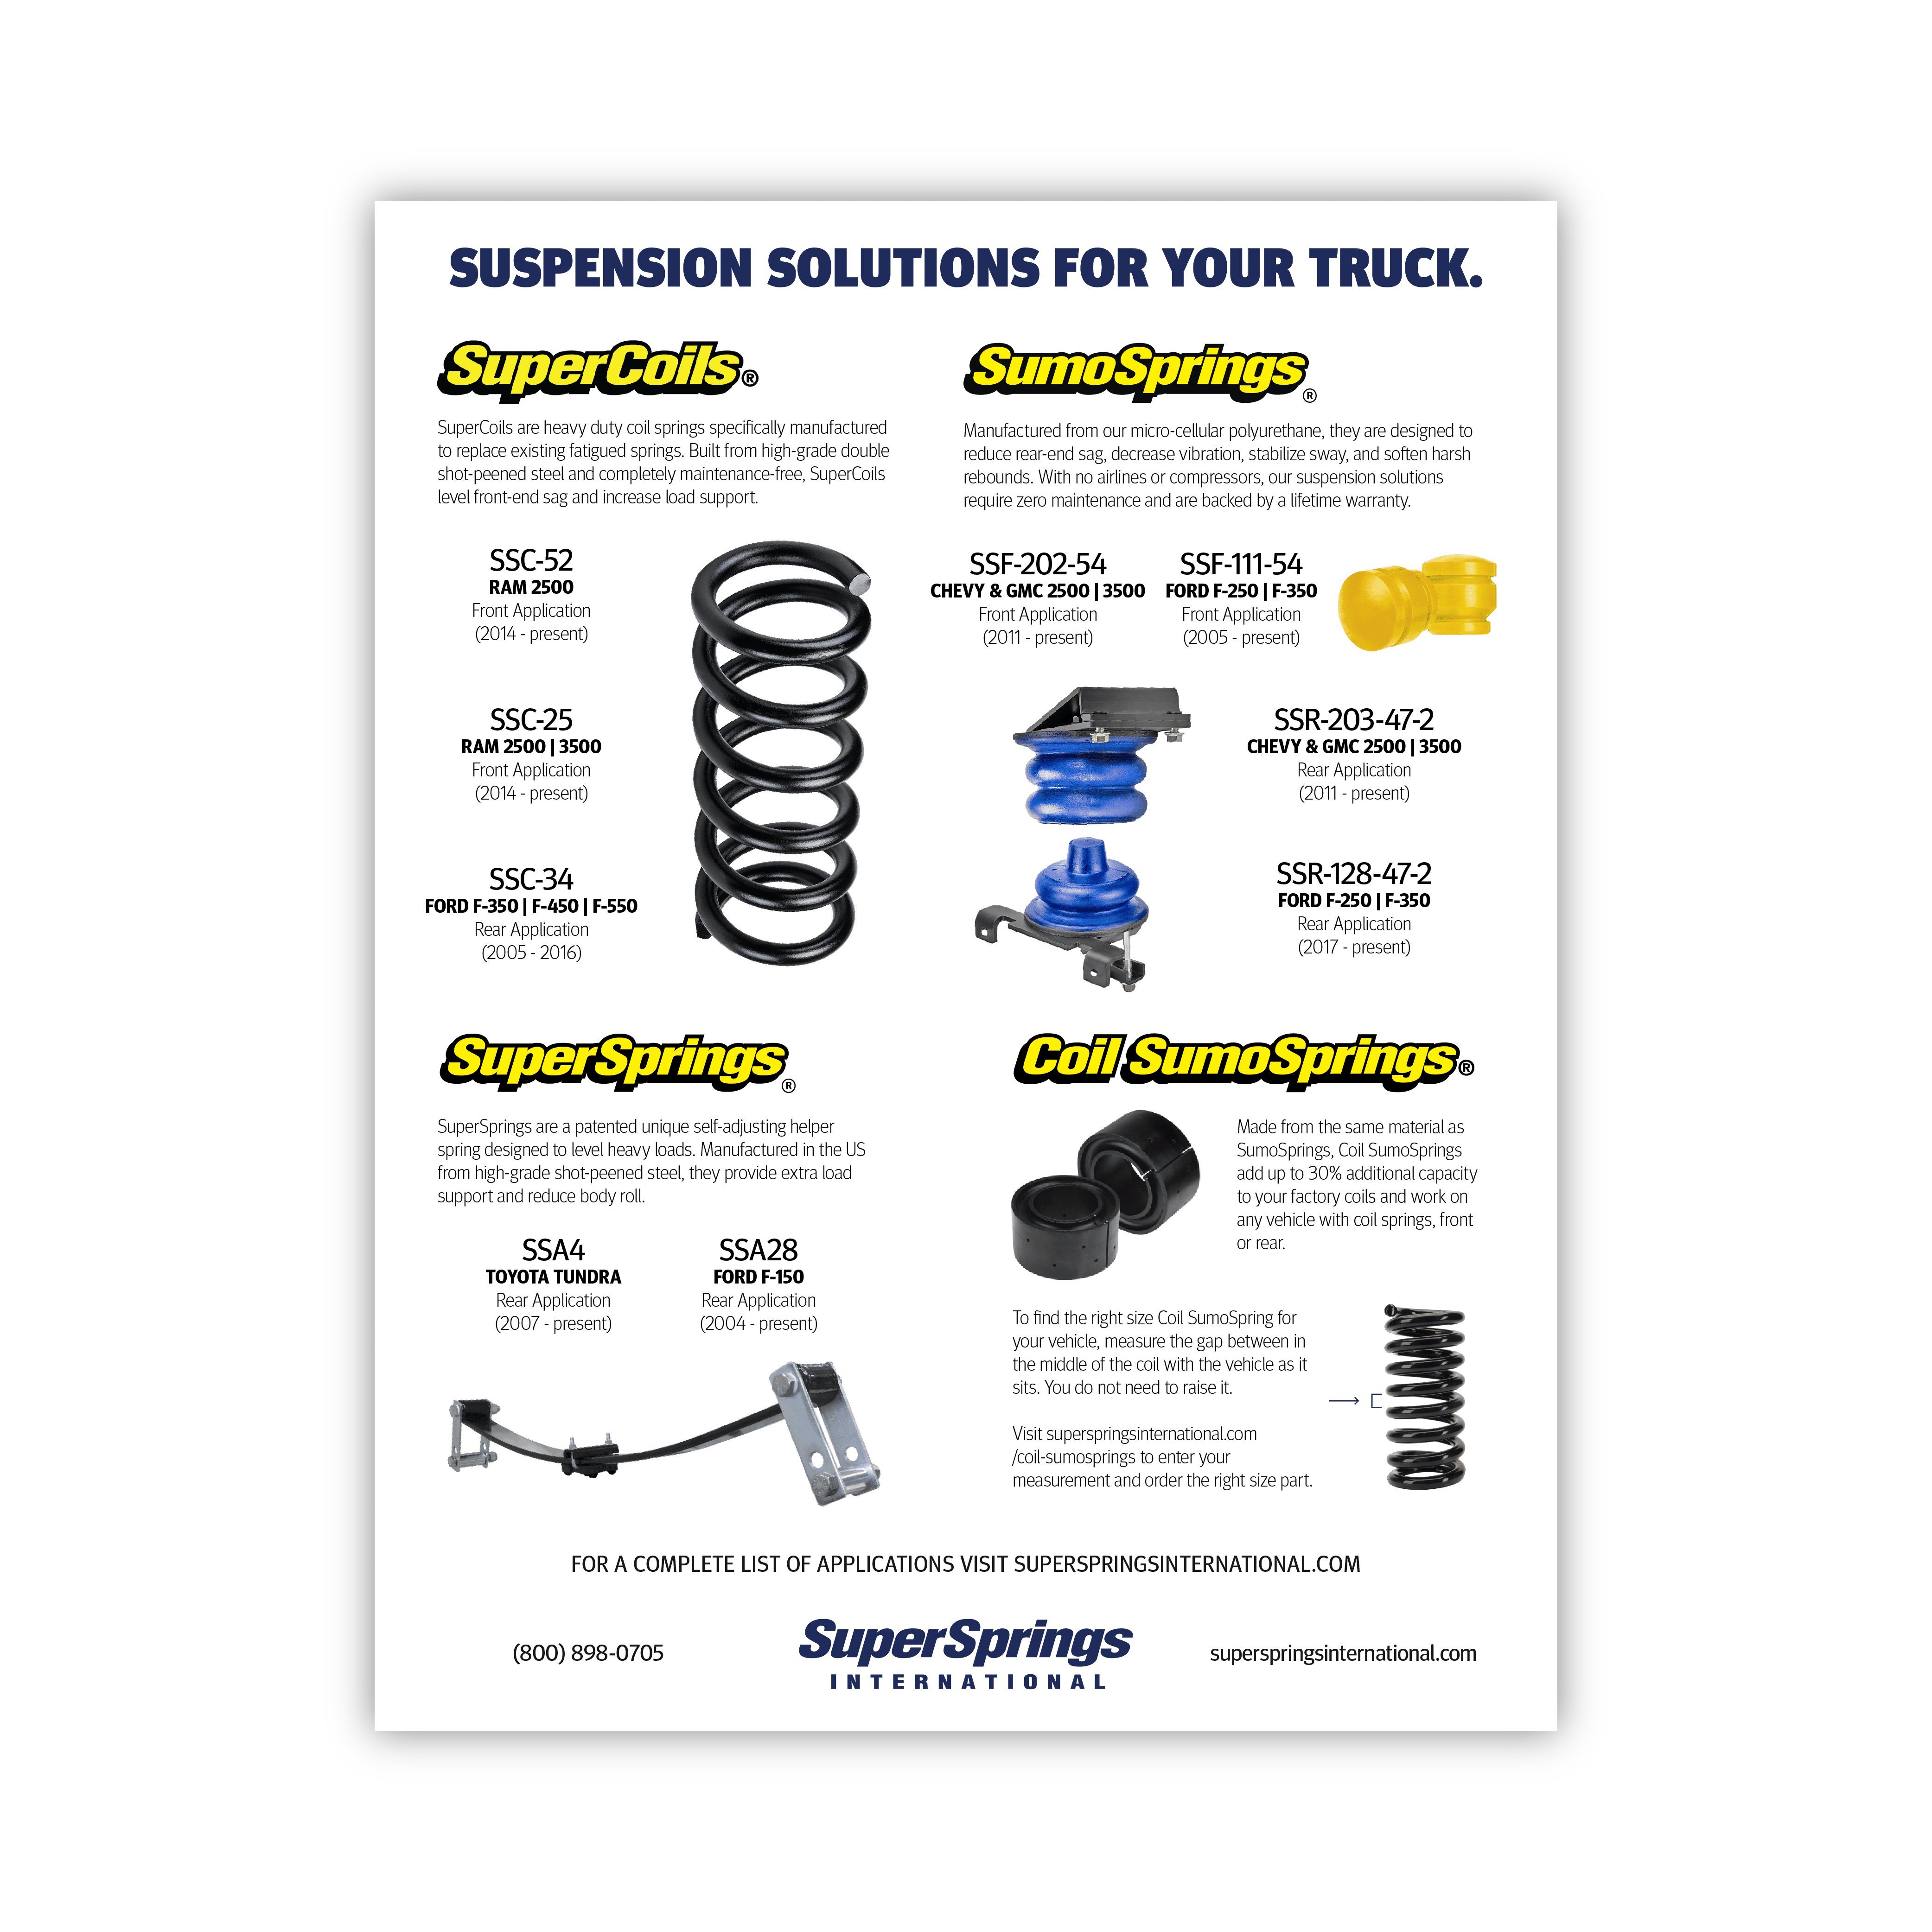
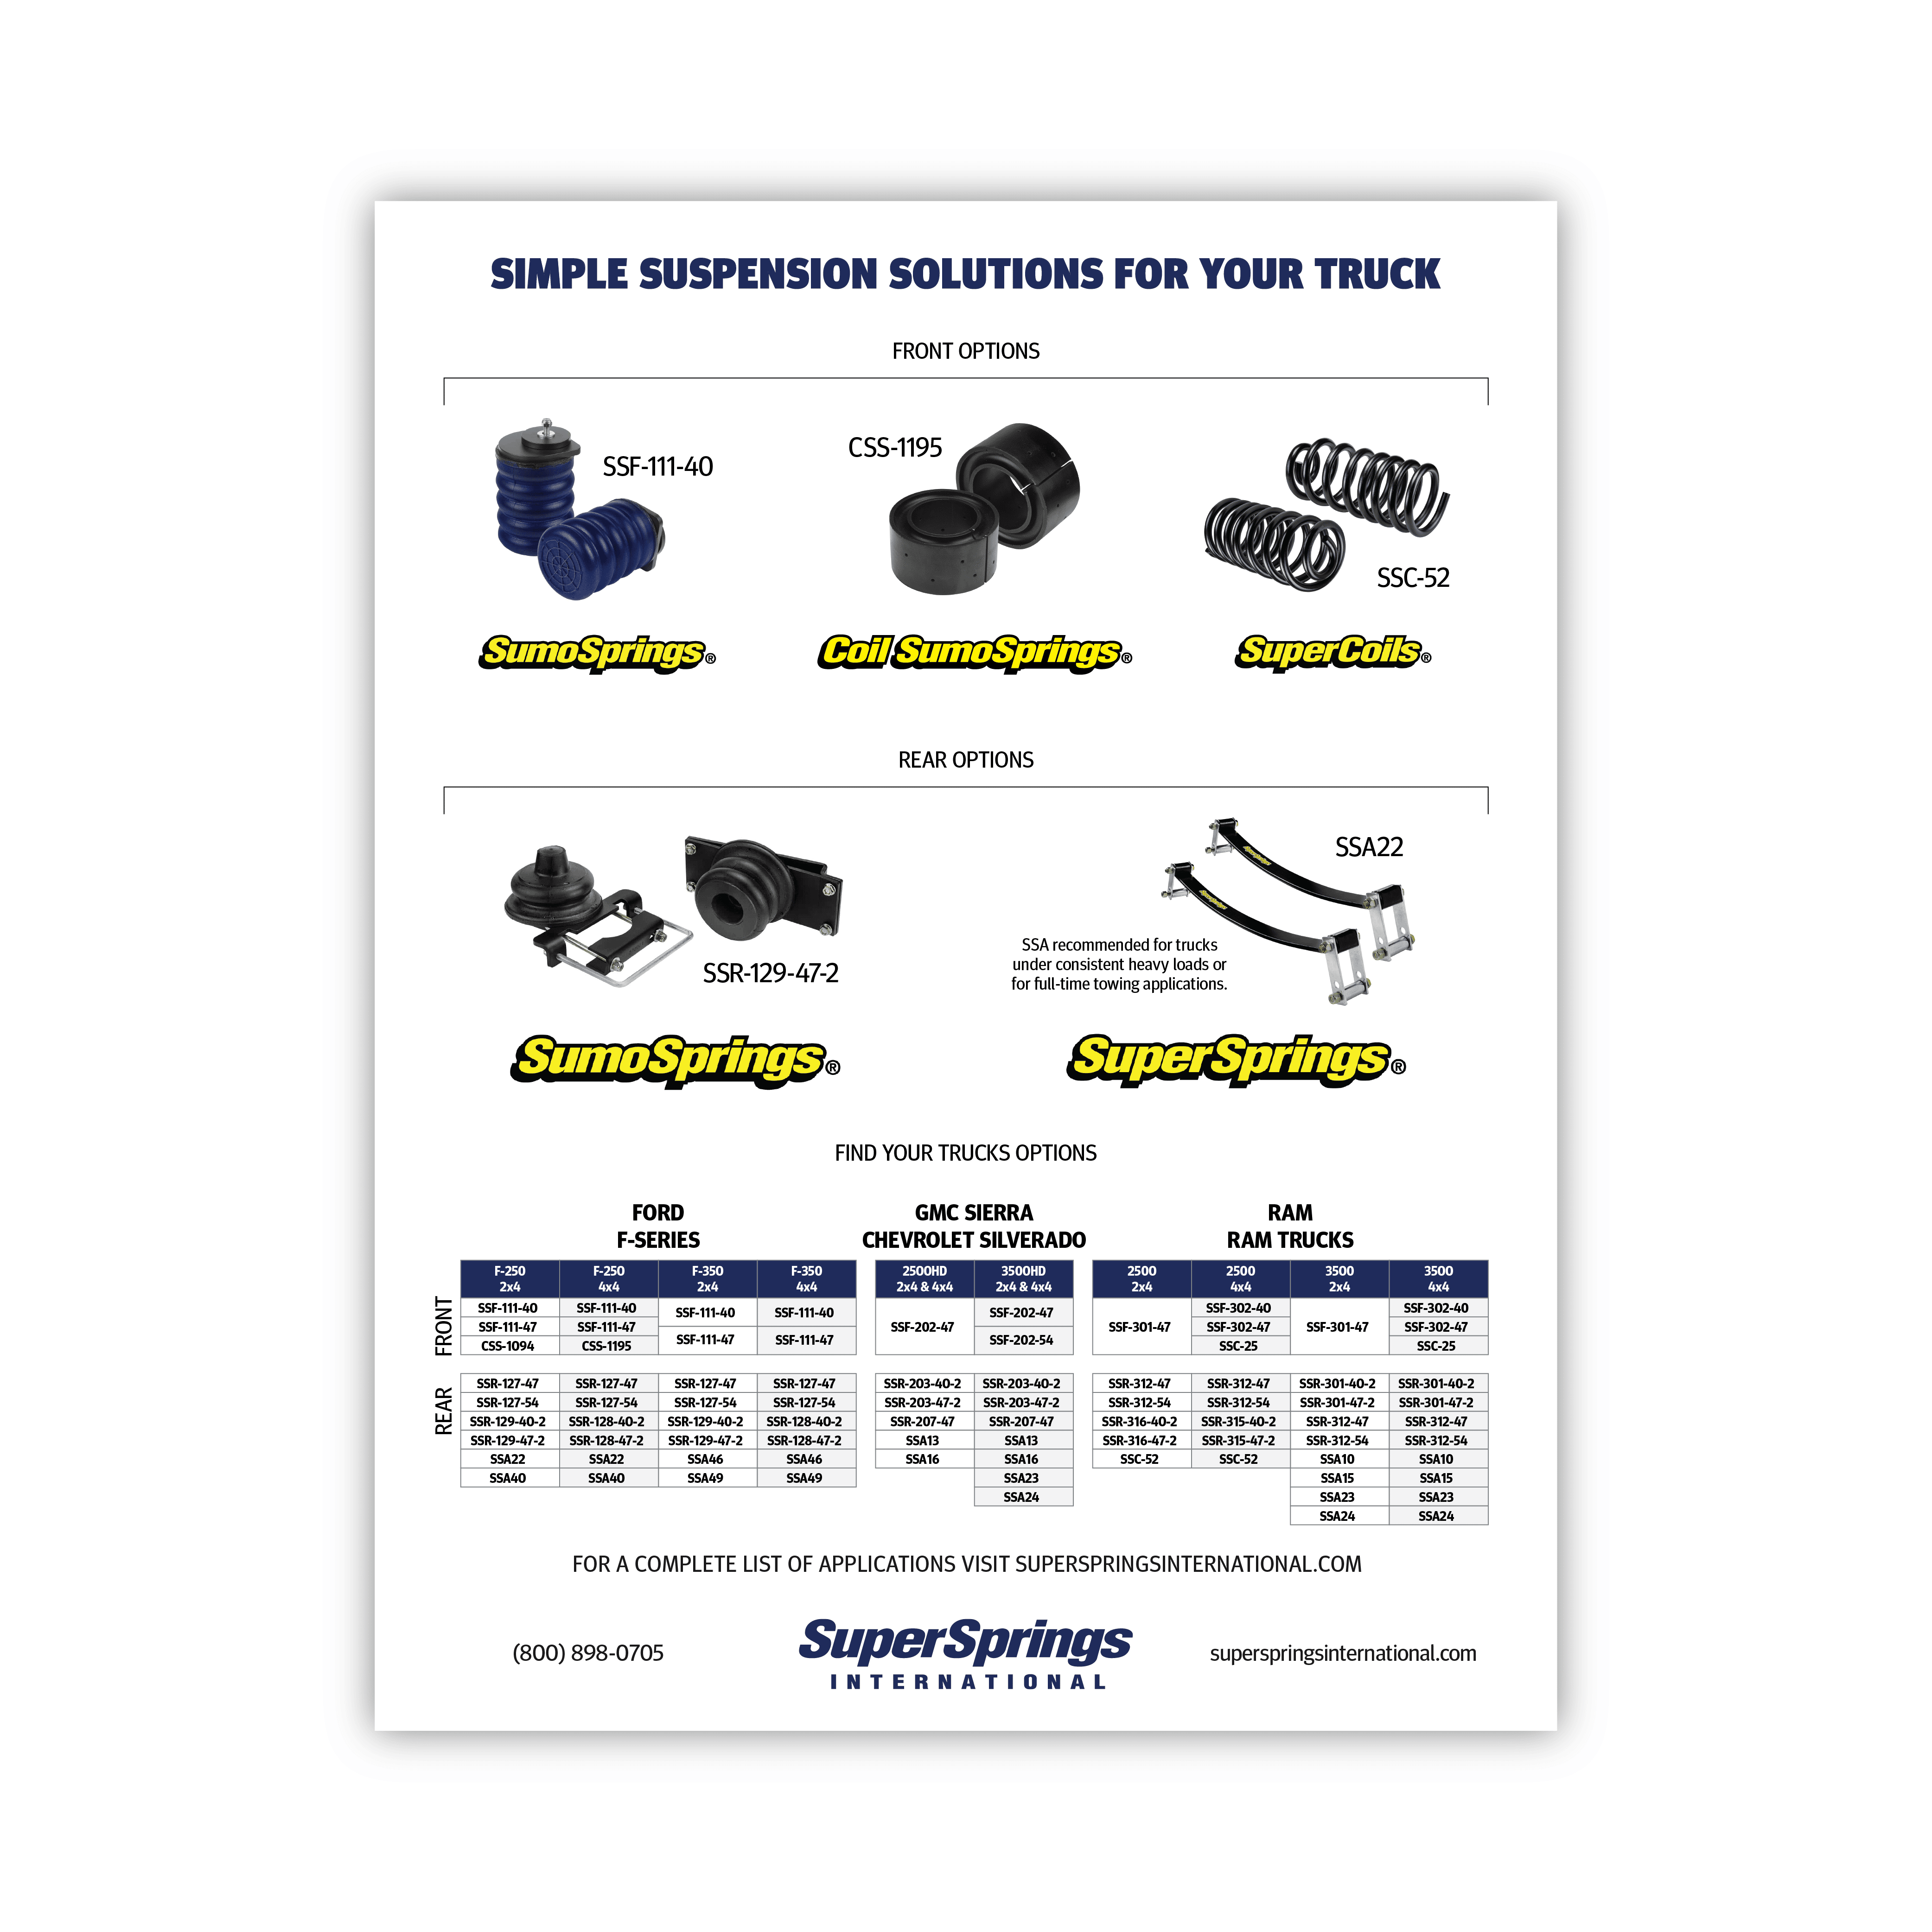
Use our application guide to see what we have for your vehicle.